Showing posts with label Indigoblu FlitterGlu. Show all posts

Friday, 1 May 2015

ALTERED ECLECTICS - bloom, grow canvas

Hello all, another challenge over at Altered Eclectics and this month I have decided to share with you a canvas I created. 

I used lots of lovely IndigoBlu stamps on this project to create a stamped layered background. 


I inked the canvas with different coloured inks and sprayed then stamped randomly over the top with IndigoBlu Itsy Bitsy Backgrounds and the IndigoBlu Ledger stamp. 
I then stamped the Umbellate stamp over the top. 

I then added swipes of FlitterGlu with my finger in random placed and added some gilding flakes. 

To finish, I added areas of melted wax to create texture around the edges of the canvas and coated the printed sentiment with UTEE. 


Ingredients...

IndigoBlu Stamps: 
A5 Itsy Bitsy Backgrounds
A6 Ledger Background
A6 Umbellate

Other bits and pieces:
ink
gilding fakes
wax
UTEE
printed words


I hope you pop over to the Altered Eclectics challenge blog and see what the other team members have been up to to inspire you this month. 


Thanks for popping by, toodles for now....

I would like to enter this creation in to the following challenges...
That Craft Place - No Cards 
The Mixed Media Monthly Challenge - May Flowers
Simon Says Stamp - Anything goes

Friday, 5 December 2014

IndigoBlu Challenge Blog #22 - Let It Snow

Hello there, and welcome to another IndigoBlu Challenge Blog inspiration session. This months Challenge Blog theme is for a hopeful winter wonderland this Christmas so..... "Let It Snow".


For this months challenge, I decided to have a rummage through my altered art pieces. Or should I say the huge pile of bits and pieces in the corner that have yet to be altered....


I chose a small paper mache box to jazz up IndigoBlu style.
I painted the box on the inside and out with IndigoBlu Gee-Sso Good White Gesso and left to dry.

I then sprayed the whole box with IndigoBlu English Cottage Artist Acrylic Paint using Grandma's Teacup which is a lovely pastel blue colour. I sprayed it all over the box and let it run over the surface. I didn't want a perfect painted look to it, just a patchy area of colour. 

I then stamped IndigoBlu Snowflake Lace on to white cosmetic tissue using Versafine ink. I attached the tissue using IndigoBlu Slap It On Matte Medium

I made the snowflake embellishment by pouring melted UTEE in to a silicon snowflake cake mould. I covered it with FlitterGlu and IndigoBlu Morris Dance Mega Flakes
I then swiped the FlitterGlu along the edge of the box lid and added the flakes.


To join in with the challenge link your entries here.

Thanks for popping by, toodles for now...
Lis xxx 


Monday, 10 November 2014

Noel

Hi folks, well, as I've been demoing for IndigoBlu for a couple of months now, I've make more Christmas cards in the last few weeks than I have in years!!!
So I thought I'd share a few demo pieces. 

This one was similar to the Merry Christmas Design that I blogged a couple of weeks ago but I used the Noel Dinkie instead. 


I again used the Snowflake Lace and used the scrummy Chocolate Box Mega Flakes and FlitterGlu. I also but the design on to black but mounted it on to a background I'd created using the English Cottage Artist's Acrylic Paints

All the products I've used for this creation are available on the IndigoBlu website. You can find the links to the website, IndigoBlu blog and IndigoBlu Challenge Blog at the top of my blog page. 

Thanks for popping by. Happy crafting. Toodles xxx 

Thursday, 6 November 2014

Beautiful Blu....

Hi folks, well, as I've been demoing for IndigoBlu for a couple of months now, I've make more Christmas cards in the last few weeks than I have in years!!!
So I thought I'd share a few demo pieces. 

This is a big 8 x 8 card but putting together some quite simple elements to show off that beautiful blue background. 


I have been loving using the IndigoBlu English Cottage Artist Acrylic Paints in spray bottles to create different backgrounds. This one I made using Wimberry Pie, Park Lane, Sleeping Beauty metallic and Aladdin metallic paints. I sprayed them on to a piece of IndigoBlu Perfect Stamping Card and on to a white tag. I cut the card down to 7.5" square for my background. I stamped the Merry Christmas Circle Dinkie on to a piece of spare sprayed card using Flitterglu and covered with the new Chocolate Box Mega Flakes
For the tag, I used the flinkie technique, which I love!!! Then went around the edge of the tag and round the edge of the background card with FlitterGlu and Chocolate Box flakes.
I cut out the Merry Christmas Circle and mounted it on some foam. I then coloured some organza ribbon and adhered it on the top of the circle. 


All the products I've used for this creation are available on the IndigoBlu website. You can find the links to the website, IndigoBlu blog and IndigoBlu Challenge Blog at the top of my blog page. 

Thanks for popping by. Happy crafting. Toodles xxx 


Saturday, 12 July 2014

Totally Gorjuss #244 - "include a tag"

Hi folks, I'm back in the game this week after a week off due to sickness. This week the challenge is "include a tag".

You can check out the challenge here.


Here is what I created for this weeks challenge...


This week I have used stamps from my fav company - IndigoBlu. 
The Miss Austen stamp from IndigoBlu is one of my favourites and I chose this to stand alone as the tag part of the card. 
I love using this stamp as it's so detailed, not just with the facial features but all the background detail included in the stamp.


I stamped it using black ink on to white card then inked around the edges with Frayed Burlap and Salty Ocean Distress Inks. I matted and layered with different card and on the final mat I adhered IndigoBlu "Winter Dawn" Gilding Flakes using IndigoBlu's super glue - "FlitterGlu".

I  used the large frame stamp from IndigoBlu Bloomin' Great stamp set to create the background and stamped it randomly using Frayed Burlap and Salty Ocean Distress Inks. 


I chose a couple of pieces of vintage print paper from my stash with muted pastel colours. I built up a pocket base with the card to slip the tag in to it which can be removed and replaced. 


I added some lace, which I inked to the base and front of the pocket, some metal embellishments, inked some flowers, added metal butterflies and hat pins to finish. 


Thanks for popping by, leave a crafty comment of you wish.


I would like to enter this creation in to the following challenges...

IndigoBlu - tag, you're it!
Artful Times - a tag

Tuesday, 29 April 2014

Happy Mothers Day Mum - 2014 card

Hello followers, I know Mothers Day was what seems like an age away, but I never got chance to show you what I made for my mum for Mother's Day. 


Here is the card I made.


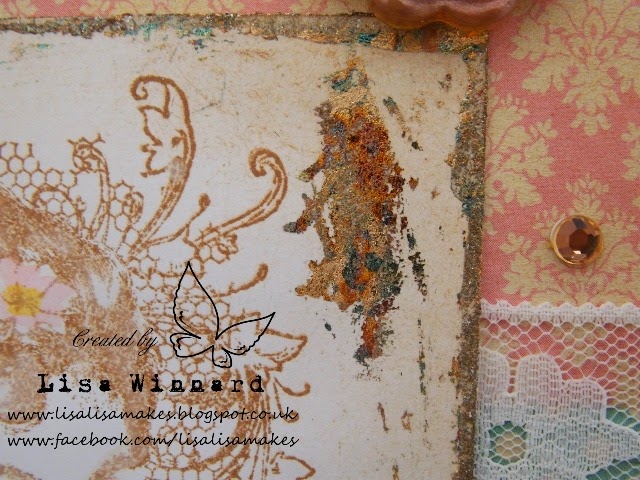
I used the gorgeous Elizabeth Bennet A6 stamp from IndigoBlu. Just stunning. I've been wanting to use this for ages and thought a lovely vintage lace creation would work well. I stamped the image on to white card with Vintage Photo Distress Ink, smudged the image with a waterbrush and coloured in the flowers with Victorian Velvet DI and the bird and butterfly with Broken China DI. 


I went round the edge of the card with the stamped image on with IndigoBlu FlitterGlu and added IndigoBlu Brighton Pier Gilding Flakes to create a faux frame.  


To create the card base background, I used the frame from the IndigoBlu Bloomin' Great stamp set, stamping close the the edge with Vintage Photo DI.


I used a piece of pink paper and green spotty paper which I already had in my stash. I inked around the edges using Vintage Photo Distress Ink.

I layered the pink and green paper on to the background then added a length of wide lace ribbon across the centre. Then added the stamped image on top.


I created a flower embellishments using Tim Holtz Tattered Florals Die, made a flower and heart embellishment from pouring UTEE into moulds and adding some mica powder. I coloured some organza ribbon with Peacock Feather DI and added a Creative Expressions Dazzler to the centre. stamped a sentiment and cut in to a banner and added it to the corner of the card and added a couple of gold gems to finish. 


Thanks for popping along to my blog today.