Showing posts with label Artifacts. Show all posts

Saturday, 24 March 2018

Sketchbooking with The Artistic Stamper Stencils

Hello folks and welcome to my post for The Artistic Stamper. This month our theme is Stencils.

I managed to get my hands on some more of the wonderful stencils at The Artistic Stamper and I had a right good play.
I have been persuading myself for the past couple of years now to try scrapbooking. And with multiple sketchbooks piling up I though lets try it....
So I grabbed one of my sketchbooks out of the pile, grabbed a handful of stencils and got to it. 

And here is the result...
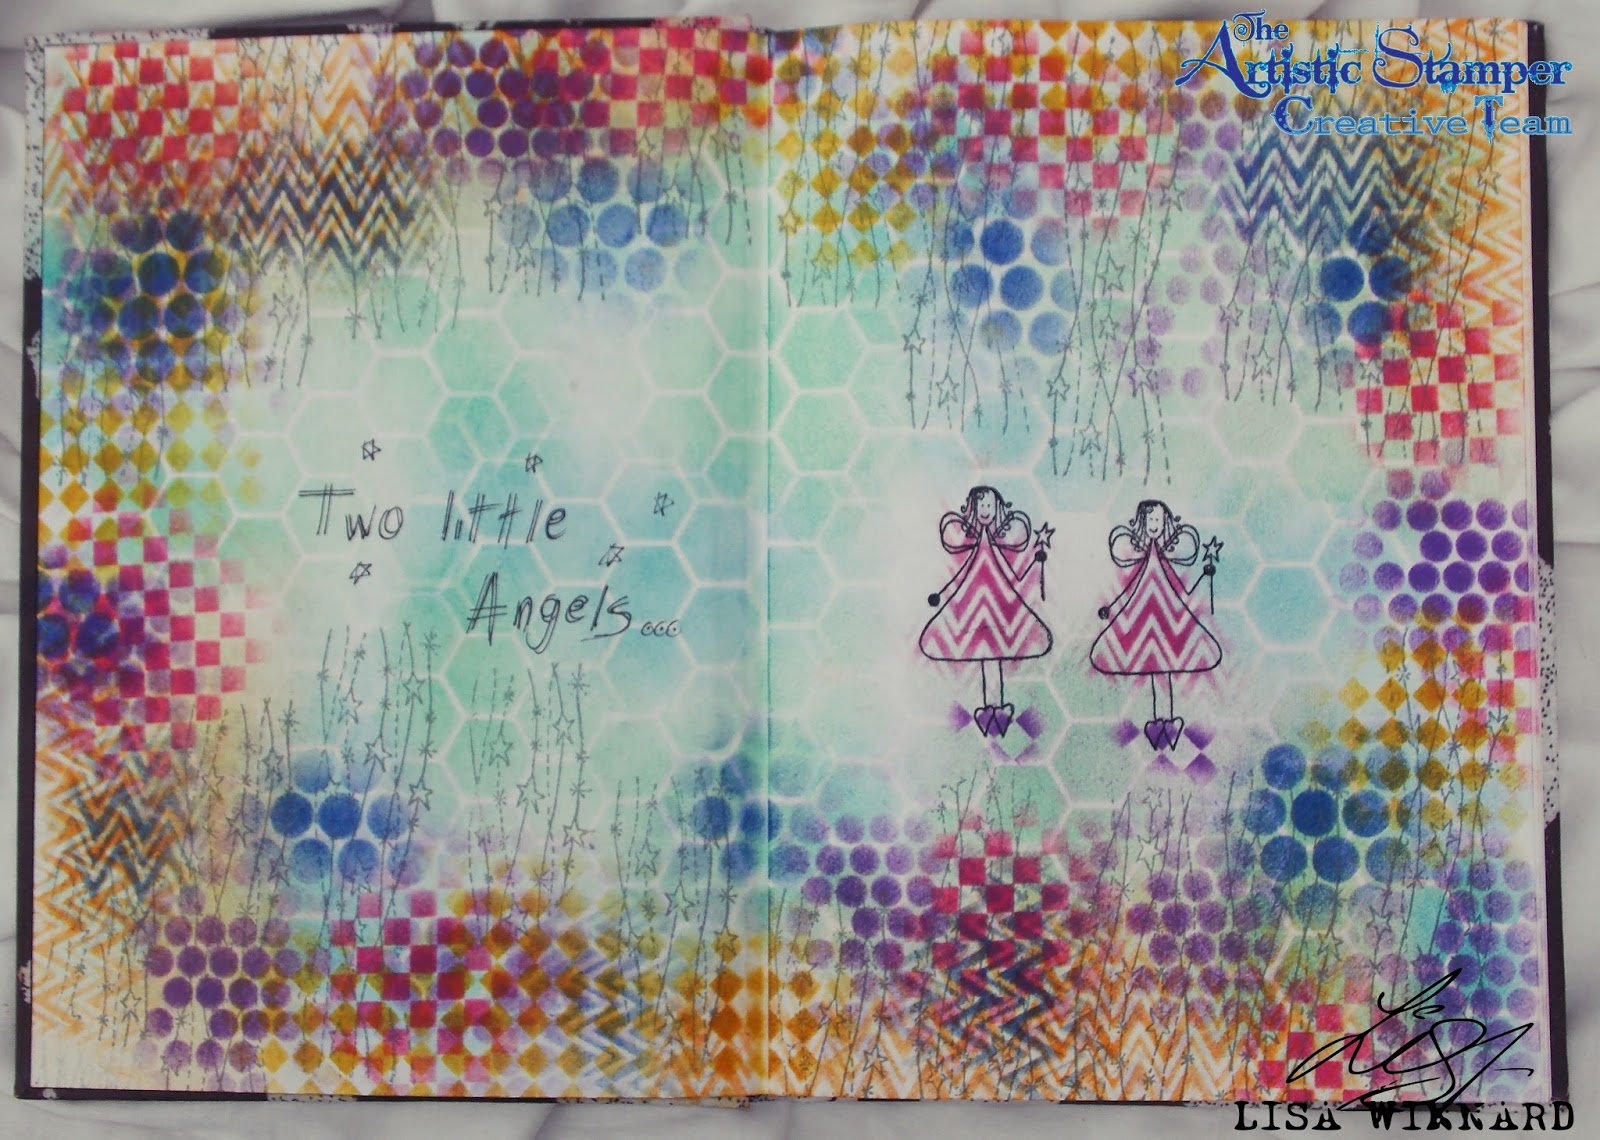

The sketchbook I used has thick textured white pages, almost like recycled paper. So the ink tended to soak in to the pages more, but I like the faded, muted look it has given. 

The selection of stencils I used from The Artistic Stamper were the 3 x 3 Harlequin, 3 x 3 chevron, 3 x 3 sequin waste, 6 x 6 random dots and 6 x 6 honeycomb.


The Artistic Stamper Mask Harlequin 3" X 3"  The Artistic Stamper Mask Chevron 3" X 3"  The Artistic Stamper Mask Sequin Waste 3" X 3"   The Artistic Stamper Mask- Random Dots 6" x 6"  The Artistic Stamper mask-Honeycomb 6" x 6"  

I used a selection of Distress Oxide Inks to ink through the stencils.


I then wanted to add some stamping over the stencilled background. So I used The Artistic Stamper Artifacts Funky Fairy stamp and Artifacts Shooting Stars stamp.

Artifacts - Funky Fairy          Artifacts - Shooting Stars   


To finish I added some handwritten words. 

From taking the plunge in to scrapbooking, finally... I have realised it comes in the form of inspiration and creativity, not perfection. It doesn't have to be perfect, over the top and overly thought out to get it down on paper. 

I hope you like what I have done with The Artistic Stencils.
If you would like to leave a comment please do so, I love to hear your thoughts. 
Toodles for now,
Lisa xxx

Sunday, 24 December 2017

Christmas Tag Decoration @ The Artistic Stamper

Hello folks and a happy and merry Christmas to you all. Today's blog post is for 

One more day till the big fella comes down the chimney.... and along with that lovely thought comes the manic wrapping!!!

So with that mind, I decided to make a Christmas decoration to go on top of a special present. 

Here is my creation...


I used Artifacts Funky Fairy stamp and the Tick Tock Christmas Baubles stamp set.

Artifacts - Funky FairyTick Tock Christmas Baubles A5 (cut out and mounted on cling cushioning)


I stamped the three baubles and the fairy with clear embossing ink on to black card. Then using white sparkle embossing powder, heat embossed it. I fussy cut the baubles out and did the same on the reverse. 


With the big bauble I stamped it again on a separate piece of card and used foam pads to make a more 3D bauble. 

I added lace and red paper ribbon to some of the baubles and attached different lengths of green/white bakers twine to each of the baubles and fairies. 


I then tied the lengths of twine together at the top with a knot.

I used some red paper ribbon to make a big bow to cover the knot of the twine.  


I hope all your Christmas gifts are wrapped as pretty. 

Wishing you all a very merry christmas and a happy and healthy 2018.
Lisa xxx 

Sunday, 10 December 2017

Star of Wonder @ The Artistic Stamper

Hello folks and welcome to my post for The Artistic Stamper. 
I've been with the team now for a couple of weeks and I'm loving playing with the amazing stamps. The only problem I'm having is choosing which ones are my favourites!!!

The theme is, of course, Christmas. And it has been snowing in the North West today so beginning to feel very festive.

Here is my creation...


I used the new Artifacts stamps, Shooting Stars and Star of Wonder. And a colour theme of kraft card and white. 

I wanted to make a tile and imprint the image of the stamp. I first gathered a collection of embossing enamel and embossing powders in white, green, clear, gold and some with lots of sparkles. It is Christmas after all....


I cut a piece of greyboard in to a square shape just bigger than the Star of Wonder stamp. I put some clear embossing ink on the greyboard and covered it with white sparkle embossing powder. Then heated it to melt it. While the powder was molten, I added more powder, and continued to do this with a selection of colours to build up the greyboard tile. 

When I was happy with the thickness of the tile, I put the Star of Wonder stamp on to an acrylic block and added some clear embossing inkI melted the top of the tile then gently pressed the stamp in to the embossing powder.

I left the stamp on the tile for a good 30 seconds then when it had cooled slightly, peeled off the stamp. 


I then cut a piece of kraft card and stamped the Shooting Stars stamp with black ink. I stamped it on the left side and right side of the card. I then adhered the embossed tile in the centre of the card. 


I added the kraft card to mats and layers of white and kraft card

To finish I distressed around the edges of the card to add some texture.


Thanks for popping by my blog today. Leave me a comment if you wish, I love to hear what you think.
Toodles for now,
Lisa xxx 


Here are the stamps I used, which are available from The Artistic Stamper website


Artifacts - Shooting Stars   Artifacts - Star of Wonder