Showing posts with label Distress Ink. Show all posts

Sunday, 11 November 2018

All Squared Up

Hello there!! I realise I have not blogged for a while, it has been a busy, busy few weeks. But, I am back with a post for The Artistic Stamper. This month's theme is "Square It".

So here is what I did...


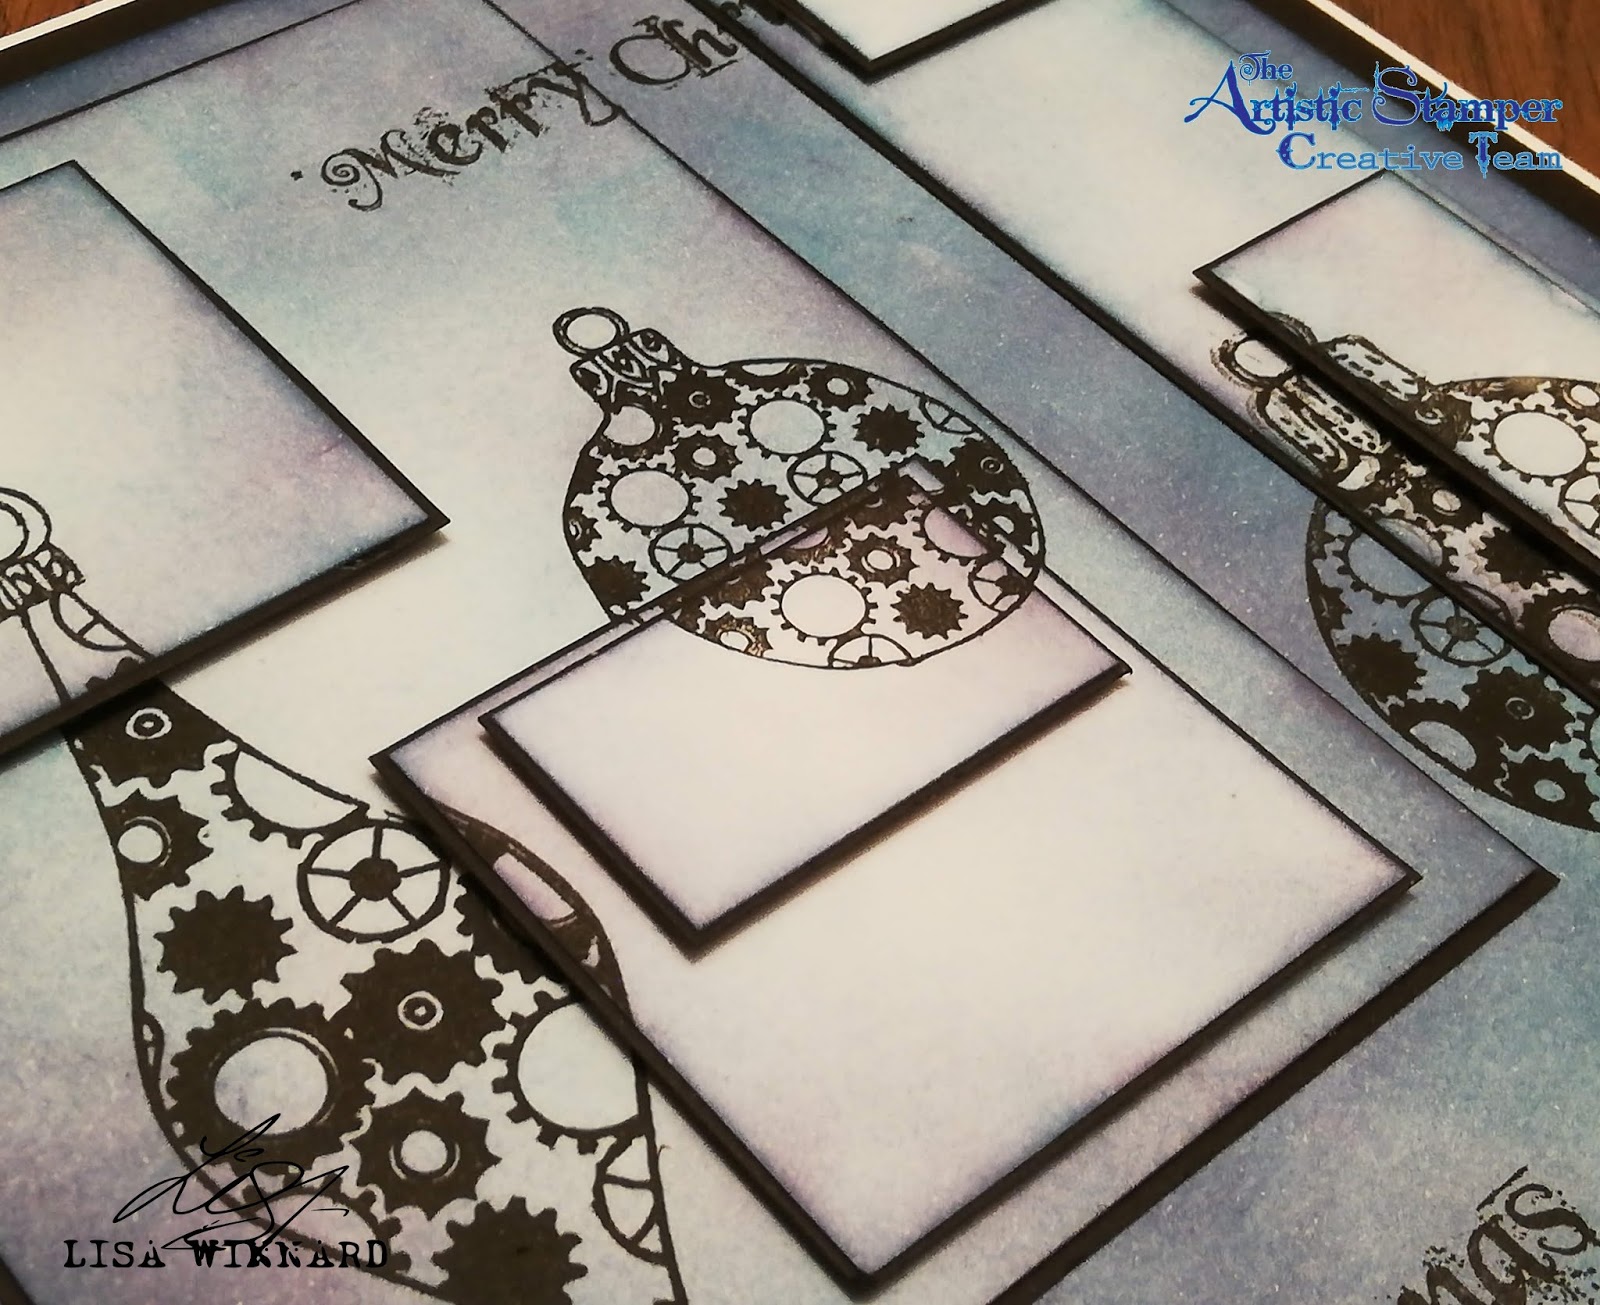
I cut a card blank at 7&3/4" square for a background then cut several other smaller pieces to fit inside the background piece.

I coloured all the individual pieces with Peacock Feathers and Dusty Concord Distress Inks.


I placed all the different card pieces in the correct places then stamped the Tick Tock Christmas Baubles on to the card.


I then matt and layered all the pieces on to black card leaving a very slim border, then used foam pads do stack each layer to give a 3D effect.

Thanks for popping by,
toodles for now.
Lisa x


Tick Tock Christmas Baubles A5 (cut out and mounted on cling cushioning)

I would like to enter this in to the following challenges -
That's Crafty challenge blog - anything goes
Sandee and Amelie Steampunk Challenges - winter special

Sunday, 13 November 2016

Make a Card week @ Tando

Hi folks, welcome to this weeks creation for Tando. The theme is 'Make a Card'.

As we are all very aware, Christmas is just around the corner and yes, I've failed miserably at sticking to one of my New Years Resolutions which was to start making Christmas cards early in the year. OOOppppppssss... I'm ashamed to say this is my first official card for Christmas.
But anyway, I'm glad to say I'm very happy with it. 

Here is my first official Christmas card and my creation for Tando...


I started with a 6 x 6 inch piece of Anna Marie Designs white super smooth piece of card.

I took the Tando Joined Snowflakes mask and laid it at an angle over the bottom of the card, then inked through Evergreen Bough Distress Ink with a Inkylicious Ink Duster brush. 


I randomly stamped sections of one of the stamps from Andy Skinner's Industrial Stamps set from Stampendous with Salty Ocean Distress Ink.
I then used the Bubbles mask from Andy Skinner and used DecoArt White Modeling Paste in random areas over the top of the Joined Snowflakes and Industrial stamping. I rubbed Imagination Crafts Cobalt Alchemy Wax just over the bubbles.


I took the Tando Mini's Music and painted them with white gesso. When they were dry I gently rubbed over Imagination Crafts Perido Alchemy Wax to give it a shimmer. 


I then used the Tando Mini's Reindeers and painted them with DecoArt English Red Oxide. I finished them with a touch of Inca Gold Alchemy Wax.


To finish the card, I stamped the Jingle Bells sentiment from Creative Expression Circle Sentiments Set on to a separate piece of card. Then cut it out and roughed up the edges with a pair of scissors. I lightly inked the sentiment with Evergreen Bough Distress Ink and inked the edges darker and adhered with a foam pad. 


Here is everything I used...


Mask - Joined Snowflakes   Distress INK PAD Evergreen Bough  TIM32854 1455536625372Distress INK PAD Salty Ocean  TIM35015  TIM35015INDUSTRIAL rubber stamp set A Skinner Stencil - BUBBLES   Media: White Modelling Paste  Tando Mini's Music   Tando Mini's Reindeer  Fluid Acrylics: English Red Oxide  Alchemy Wax - Cobalt Alchemy Wax - Peridot  Alchemy Wax - Inca GoldImage result for creative expressions circle sentiment


Thanks for popping by
Lisa xxx


Sunday, 10 January 2016

colour theme @ Tando

Hi folks and welcome to my 1st post of 2016!!! Hope Christmas and New Year was enjoyable for you all.

My 1st 2016 post is for the colour theme challenge over at Tando.

Here is the gorgeous colour palette for January.


For this project, I decided to do something simple using ATC chipboard shapes. I chose 3 to work on and added more chipboard embellishments to present hopes for the new year.

Here is what I did....
(the blue looks a bit lighter on the photos than on the colour palette....)


I love these chipboard pieces. They are just the right size to add embellishments to.


plate #1
plate #2
plate #3

I used lots of products to add texture to the plates. DecoArt crackle paint, DecoArt sand texture paste, DecoArt matte medium, Mustard Seed distress embossing powder and Distress Ink along with Stamp-It Australia 'Time to Dream' stamp set. 


texture, texture, texture
I first added texture paste and crackle paint to the blank chipboard plates then painted them with different tones of blue from the colour chart.

I added the different chipboard embellishments and used Mustard Seed Distress Ink on areas of the embellishments then used Mustard Seed Distress Embossing Powder (which I love, by the way) over the top to highlight.


lovin' the Tim Holtz Distress Embossing Powder
 - Mustard Seed
lovin' the Tim Holtz Distress Embossing Powder
 - Mustard Seed

I then stamped some of the words from the Stamp-It Australia 'Time to Dream' stamp set on a white cosmetic tissue and used DecoArt Matte Medium to adhere it to the plates. 


dream.....
- matte medium

I think I am defo going to do some more of these in the future. They are fabulous for turning in to tags, for journal pages or to be used simply on their own.


plates #1, #2 & #3


Thanks for popping by, I hope you like my 1st project of 2016. Many more to come....
Toodles for now, 


Bits & Pieces I used...
Tando... (available on the Tando Website)
Hearts grab bag 
Arrows grab bag
Tando minis - frames
Tando minis - people
Tandos mini - advent numbers
Set of 5 keys
Locks and latches

DecoArt...Media Range:
crackle paint
sand texture paste
matte medium

Stamps...
Stamp-it Australia - 'Time To Dream'

Other products I used...
Tim Holtz Distress Ink - Mustard Seed
Tim Holtz Distress Embossing Powder - Mustard Seed 


Grab Bag of Hearts  Arrows Grab Bag  Tando Minis - People  Set of 5 Keys  Tando Minis - Frames