Showing posts with label Vintage Photo DI. Show all posts

Monday, 1 February 2016

Gift Bags @ Ellectic Ellapu

Hello and welcome to the first challenge of 2016 over at Eclectic Ellapu.
We have had a few weeks off to chill over Christmas but are back with the first of this years challenge. 
The theme is Make/decorate a gift bag.

Here is what I did...

decorated gift bag

I took a ready-made brown paper gift bag and dry brushed white gesso roughly over the front, back, sides and handles of the bag.

I took a piece of thick paper and screwed it up to put creases in it then covered it with Vintage Photo Distress Ink and sprayed it with water. I randomly stamped it with a florish stamp and Versafine Vintage Sepia ink to create a subtle effect. Then adhered it to the front centre of the gift bag. 

vintage photo distress ink
flourish stamp

I used some lace ribbon layered with brown woven ribbon and stuck it along the bottom half of the inked card. I then arranged a floral embellishment with paper flowers, paper cord, leaves and an old chain.

lace ribbon

floral embellishment with paper flowers

I did the same at the top of the bag on the handle and added an organza ribbon bow.

organza ribbon

paper cord and chain

Check out the rest of the purple teams creations for this month's challenge. Hope to see you there.

Thanks for popping by,
toodles for now...

Thursday, 11 September 2014

PaperArtsy GDT

yyyyeeeeyyyyy.... It's here. The time I get to share with you all. It's my Guest Design Team post for PaperArtsy.


I was recently offered the opportunity to play a small part on the Paperartsy Design Team. And as I am a huge fan of everything Paperartsy I of course jumped at the chance.

So... I was asked to chose a stamp plate and some PaperArtsy Fresco Finish Chalk Acrylic paints. I chose the gorgeous Hot Picks 1211 stamp plate and South Pacific and Beach Hut Fresco Finish paints to work with.

I chose the Hot Picks 1211 stamp set because I fell in love with the vintage sewing images. As I have a background in textiles I have always enjoyed working with vintage sewing patterns, searching for vintage materials and fabrics.... so this stamp plate seemed perfect. 

I decided to make something different and wanted to concentrate on the 3D element. I chose to make a vintage themed sewing box. I wanted the box to have a 'Cinderella' feel about it. The part in the film when the little mice sew a beautiful dress for Cinderella and the are running around in between the cotton reels.... 


I chose quite a large MDF box to work with. I sanded the box and gave it a couple of coats of white gesso. 
I painted the inside of the box with South 
Pacific and the outside and lid with Beach Hut PaperArtsy Fresco Finish Chalk Acrylics. 


I stamped the multiple cotton reel tops stamp on to one-ply of cosmetic tissue using Versafine Vintage Sepia ink in a repeat pattern to cover the size of the lid. I adhered it to lid using IndigoBlu's Slap It On Matte Medium. 


I stamped the full cotton reel stamp numerous times to create a line with Versafine Vintage Sepia ink. I did this twice and adhered it to each short side of the box. I did the same with the tape measure stamp and adhered it to the long sides of the box.


I painted some wooden cotton reels with South Pacific Fresco Finish and inked over them with Vintage Photo Distress Ink then wrapped different threads around each reel. I used some white cotton, vintage lace and a length of vintage trim which I inked with Vintage Photo and Peacock Feathers Distress Ink. 


I then stamped the round cotton reel end a number of times on to white card using Versafine Vintage Sepia ink, distressed them with Vintage Photo Distress Ink and adhered them to each end of the wooden cotton reels. 


I made a little folded packet from card and stamped the needles stamp on the front using Versafine Vintage Sepia ink. Then inked over it with Vintage Photo Distress ink. 


I hunted around in my large collect of vintage stash for some embellishments. I found some buttons, an old distressed dressmaking tape measure and some metal findings. 
I arranged the found pieces on top of the box lid with wooden cotton reels and needle packet. 


To finish, I dyed a length of lace with the distress inks and adhered it at the base of the box.


Check out my creation over at the Paperartsy blog here


Thanks for popping by, leave a crafty comment if you wish. xxx 

Saturday, 14 June 2014

Totally Gorjuss DT Challenge # 240

This weeks challenge at Totally Gorjuss is all about Dad. As it is Fathers Day tomorrow we thought we would dedicate this challenge to all the Daddy's out there.
Check out the challenge blog here.

This year, I made my Dad this... 


It is a MDF plaque to hang in his shed from my daughters. I made this for him rather than buying anything as my Dad is the most difficult person in the world when it comes to birthdays, Christmas or any other celebration. I thought he might like this more than something he will shove in a drawer for the next 10 years!!!


So, how I made my creation....

I covered the MDF with a couple of coats of Gesso to start. I cut loads of cogs from a Spellbinders die and laid them on top of each other so they were thicker. I added loads of little watch part pieces around the card cogs and gave everything another coat of Gesso.

I then got out a bunch of Distress Inks and started to play. As Distress Inks are obviously ink not paint you can build layers on top of layers. Each coat soaks in to each other so the colours don't turn out as dark as when they are initially applied. 

I continued to add colour until I was happy. I added some black paint around the edge of the MDF and brushed some Gesso over the top with a dried brush to highlight some areas.

I finished the plaque by threading through some jute string at the top to hand it.


Bit & bobs I used...

* Gesso.
* Spellbinders die set - Cogs.
* Distress Inks:
old paper, frayed burlap, gathered twigs, brushed corduroy, vintage photo, walnut stain, forest moss, mowed lawn.
* Watch pieces.


Thanks for popping by and having a toot, leave me a crafty comment if you wish. 
Toodles for now.


I would like to enter my creations in to the following challenges:
613 Avenue Create - anything goes


Saturday, 31 May 2014

Totally Gorjuss Design Team - My 1st challenge #238

Challenge #238 - stitching, real or not.

Welcome to my 1st Totally Gorjuss Design Team challenge!!

First I thought I'd tell you a bit about this fab design team. Each week there is a theme but.... no rules!!! Yey!!!!!! NO RULES!!!!

Which means, each week you can enter anything in to the challenge, a card, box, altered art, a 3D project, mixed media, anything.... Just link it to the theme and as long as its "Totally Gorjuss", you are away!!!

So come on, join in, have fun and create!!!

The theme for this challenge is: stitching, real or not.


Here is what I created for the DT:


Bits and bobs I used:

IndigoBlu A5 'In stitches' stamp set. 
IndigoBlu A6 'Sewing Pattern'background stamp.
Kanban 'Measurements' stamp.
Vintage Photo Distress Ink.
Docrafts 'Vintage Notes' crochet flower.
Pearl hat pins.
Doily.
Lace.
Hessian.
Buttons.


Thanks for popping by today, be sure to leave me a crafty comment. 


I would like to enter this creation into the following challenges:

The ABC challenge - M is for monochromatic
IndigoBlu - #16 Monochromatic
That craft place - ribbon/lace


Tuesday, 29 April 2014

Happy Mothers Day Mum - 2014 card

Hello followers, I know Mothers Day was what seems like an age away, but I never got chance to show you what I made for my mum for Mother's Day. 


Here is the card I made.


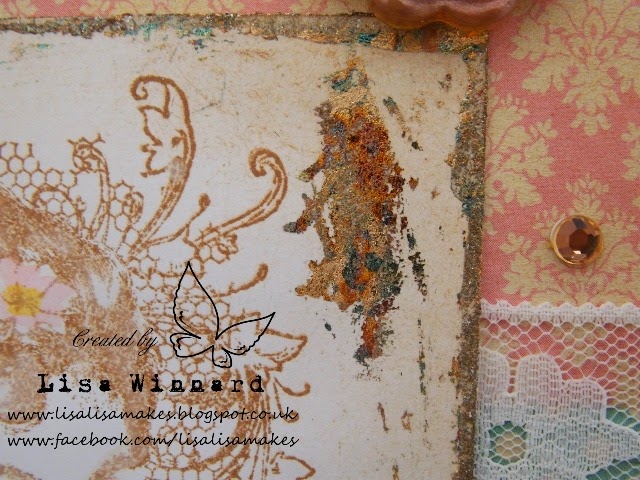
I used the gorgeous Elizabeth Bennet A6 stamp from IndigoBlu. Just stunning. I've been wanting to use this for ages and thought a lovely vintage lace creation would work well. I stamped the image on to white card with Vintage Photo Distress Ink, smudged the image with a waterbrush and coloured in the flowers with Victorian Velvet DI and the bird and butterfly with Broken China DI. 


I went round the edge of the card with the stamped image on with IndigoBlu FlitterGlu and added IndigoBlu Brighton Pier Gilding Flakes to create a faux frame.  


To create the card base background, I used the frame from the IndigoBlu Bloomin' Great stamp set, stamping close the the edge with Vintage Photo DI.


I used a piece of pink paper and green spotty paper which I already had in my stash. I inked around the edges using Vintage Photo Distress Ink.

I layered the pink and green paper on to the background then added a length of wide lace ribbon across the centre. Then added the stamped image on top.


I created a flower embellishments using Tim Holtz Tattered Florals Die, made a flower and heart embellishment from pouring UTEE into moulds and adding some mica powder. I coloured some organza ribbon with Peacock Feather DI and added a Creative Expressions Dazzler to the centre. stamped a sentiment and cut in to a banner and added it to the corner of the card and added a couple of gold gems to finish. 


Thanks for popping along to my blog today.