Showing posts with label peacock feathers DI. Show all posts

Thursday, 11 September 2014

PaperArtsy GDT

yyyyeeeeyyyyy.... It's here. The time I get to share with you all. It's my Guest Design Team post for PaperArtsy.


I was recently offered the opportunity to play a small part on the Paperartsy Design Team. And as I am a huge fan of everything Paperartsy I of course jumped at the chance.

So... I was asked to chose a stamp plate and some PaperArtsy Fresco Finish Chalk Acrylic paints. I chose the gorgeous Hot Picks 1211 stamp plate and South Pacific and Beach Hut Fresco Finish paints to work with.

I chose the Hot Picks 1211 stamp set because I fell in love with the vintage sewing images. As I have a background in textiles I have always enjoyed working with vintage sewing patterns, searching for vintage materials and fabrics.... so this stamp plate seemed perfect. 

I decided to make something different and wanted to concentrate on the 3D element. I chose to make a vintage themed sewing box. I wanted the box to have a 'Cinderella' feel about it. The part in the film when the little mice sew a beautiful dress for Cinderella and the are running around in between the cotton reels.... 


I chose quite a large MDF box to work with. I sanded the box and gave it a couple of coats of white gesso. 
I painted the inside of the box with South 
Pacific and the outside and lid with Beach Hut PaperArtsy Fresco Finish Chalk Acrylics. 


I stamped the multiple cotton reel tops stamp on to one-ply of cosmetic tissue using Versafine Vintage Sepia ink in a repeat pattern to cover the size of the lid. I adhered it to lid using IndigoBlu's Slap It On Matte Medium. 


I stamped the full cotton reel stamp numerous times to create a line with Versafine Vintage Sepia ink. I did this twice and adhered it to each short side of the box. I did the same with the tape measure stamp and adhered it to the long sides of the box.


I painted some wooden cotton reels with South Pacific Fresco Finish and inked over them with Vintage Photo Distress Ink then wrapped different threads around each reel. I used some white cotton, vintage lace and a length of vintage trim which I inked with Vintage Photo and Peacock Feathers Distress Ink. 


I then stamped the round cotton reel end a number of times on to white card using Versafine Vintage Sepia ink, distressed them with Vintage Photo Distress Ink and adhered them to each end of the wooden cotton reels. 


I made a little folded packet from card and stamped the needles stamp on the front using Versafine Vintage Sepia ink. Then inked over it with Vintage Photo Distress ink. 


I hunted around in my large collect of vintage stash for some embellishments. I found some buttons, an old distressed dressmaking tape measure and some metal findings. 
I arranged the found pieces on top of the box lid with wooden cotton reels and needle packet. 


To finish, I dyed a length of lace with the distress inks and adhered it at the base of the box.


Check out my creation over at the Paperartsy blog here


Thanks for popping by, leave a crafty comment if you wish. xxx 

Tuesday, 29 April 2014

Happy Mothers Day Mum - 2014 card

Hello followers, I know Mothers Day was what seems like an age away, but I never got chance to show you what I made for my mum for Mother's Day. 


Here is the card I made.


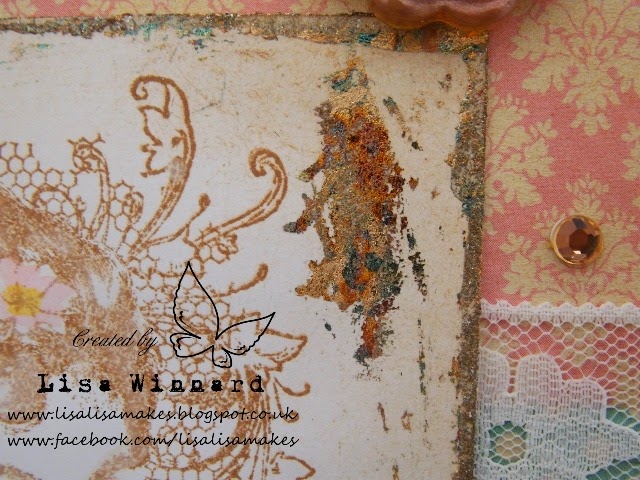
I used the gorgeous Elizabeth Bennet A6 stamp from IndigoBlu. Just stunning. I've been wanting to use this for ages and thought a lovely vintage lace creation would work well. I stamped the image on to white card with Vintage Photo Distress Ink, smudged the image with a waterbrush and coloured in the flowers with Victorian Velvet DI and the bird and butterfly with Broken China DI. 


I went round the edge of the card with the stamped image on with IndigoBlu FlitterGlu and added IndigoBlu Brighton Pier Gilding Flakes to create a faux frame.  


To create the card base background, I used the frame from the IndigoBlu Bloomin' Great stamp set, stamping close the the edge with Vintage Photo DI.


I used a piece of pink paper and green spotty paper which I already had in my stash. I inked around the edges using Vintage Photo Distress Ink.

I layered the pink and green paper on to the background then added a length of wide lace ribbon across the centre. Then added the stamped image on top.


I created a flower embellishments using Tim Holtz Tattered Florals Die, made a flower and heart embellishment from pouring UTEE into moulds and adding some mica powder. I coloured some organza ribbon with Peacock Feather DI and added a Creative Expressions Dazzler to the centre. stamped a sentiment and cut in to a banner and added it to the corner of the card and added a couple of gold gems to finish. 


Thanks for popping along to my blog today.


Monday, 7 April 2014

Follow Your Dreams

Today's post is all about gilding flakes. Gilding flakes and ink.... I tried this technique a few weeks ago and got a bit aggravated. But after having discussions with my crafty facebook buddies and watching a few demos, the penny dropped. 

For this project I used the utterly gorgeous "Art Flowers" stamps designed by Sam Poole. I love these stamps and I always find myself going back to them.  I also used my lovely Peacock Feathers and Iced Spruce Distress Inks along with Indigoblu 'Brighton Pier' gilding flakes. 

This technique consists of using two or three different colours of ink to colour the stamp but leaving areas for the flitter glue to sit which will then be covered with gilding flakes. Sounds complicated right!!?? Well, I think I actually cracked it! After playing around with different card, ink, amounts of glue etc, etc. I think I've found a way that works!! 

And here it is....


Thanks for visiting today, hope you will leave me a comment. 


I would like to enter this creation in to the following challenges:


Sentimental Sundays - challenge #201 vintage/steampunk
Sunday Stamper - week 302 
Stampin' for the weekend - spring colours
Country View Challenges - It's challenge #14
Artful Times - Challenge #52

Friday, 28 March 2014

Flowers Are The Music Of Life tag

I've been playing, and have had a lovely time. I've been using one of my favourite stamp sets - button florals. 
I love this stamp set! It has lots of little funky stamps and I always find myself going back to them.

I'm also having a blue period and I automatically go for the blue tone ink pads. I think this period is going to last for a while because at the minute, I'm in love with my Peacock Feathers Distress ink!!!  

I decide to recycle some cardboard and create a tag.


I made some 'homemade' texture paste and put it through a dotty mask then inked the tag in three diagonal strips with Distress Ink. 

I then created the background using a selection of the stamps from the buttons floral set. Randomly stamping the circles then embossing with gold powder and doing the same with the spots with black powder. 

I stamped on to tissue with a music notes stamp, tore the tissue and applied it to the tag using bees wax. 

I coloured the flowers with peacock feathers distress ink and dipped it in the wax. I did the same with some silk leaves. 

I added a sentiment, corner embellishment and some ribbon.  


Thanks for looking, hope you leave a comment.....