Sunday 30 September 2018

Mixed Media Ring Binder

Hello lovely crafters. I'm here with my creation for Itsy Bitsy.

For this creation I decided to decorate a Tando Creative greyboard folder. 
Greyboard is a fantastic base to work on as it strong enough to take numerous layers of different mediums. The size of the folder is just a bit bigger than A4 with a front overflap which wraps around the front of the folder.


So, here is my finished creation...


And this is how I did it....

First I painted the folder, both front and back with Itsy Bitsy white 2 in 1 Gesso Mixed Media Paste. 


I worked on small areas at a time as the overall size of the folder was so big.  I painted a section of the folder with a light wash of Itsy Bitsy Misty Fog Chalk Paint and then added torn pieces of the Touch Of Nature Decoupage Paper with Craft Glue.


I continued to add the Misty Fog paint and brought in another colour which was the Sailing Sky Chalk Paint.  Then added some Texture Sand.


And Mixed Media Art Stones.


I added some more texture using the Floral and Net stencils and Mixed Media Paste.


I wanted to create a matt background with a mix of colours so continued to add and blend the chalk paints.  But I also wanted to add some shine, so chose the Tinted Metallic Paints. I applied a small amount of the Caribbean Teal Tinted Metallic paint over the top of the stencilled Mixed Media Paste with my finger using it more like a wax than a paint.


Using the Primed Chipboard 'Making Memories Everyday' piece. I painted it with  Caribbean Teal and Silver Charm Tinted Metallic Paints and attached it to the front of the folder.


I then painted the rest of the folder, both the back and inside with the chalk paints.


Thanks for popping by the blog today to see my creation.
Toodles for now. Lisa x 


Wednesday 12 September 2018

Winged Compass

Hello lovely peeps and welcome to my post for the Itsy Bitsy design team. I have been playing with lots of mixed media products including lots of lovely chipboard pieces.  

Here is my finished creation.


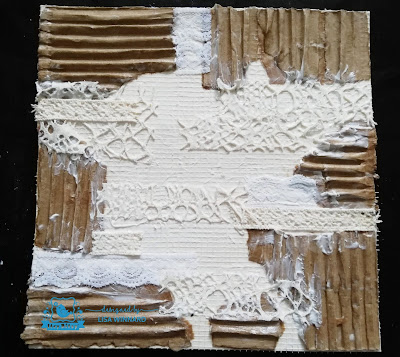
Firstly, I cut a piece of board approx 8 inch square to work on as I needed a good sturdy background to take lots of mixed media products and textures. I first covered the background with some drywall tape. (I love using drywall tape to add texture. It is cheap and easy to use and gives a lovely uniformed pattern with slightly raised texture and you can add more or less to suit.)


I then tore up some cardboard and added pieces to the background using Soft Gel Matte Medium.


I added some Crochet Lace along with some other pieces of textured ribbons.


Next, I cut pieces of the Chipboard Arrows and Chipboard Chevrons and added them to the background using the Soft Gel Matte Medium.


To add lots more texture, I raided my craft stash of metal embellishments. Some of these I have had for years and they consist of bits of broken costume jewellery and purposely bought metal embellishments.
I also added piles of Texture Sand and Mixed Media Stones.


When everything had dried and all the embellishments were secure I painted the whole background with the White Mixed Media Paste. I painted a couple of coats of the Mixed Media paste to ensure the metal embellishments were covered and the whole background was pure white.
I then gave the background a wash of colour with Sailing Sky Chalk Paint. I watered down the paint quite well so the paint flowed in to all the little nooks of the background.


I added some more colour to the middle of the background using Frosted Pool Alcohol Splash.


After the background had dried, I dry brushed a layer of the white Mixed Media Paste to tone the background colour down. While that was drying, I worked on the other chipboard embellishments.
I used the Angel Wings Chipboard and the Compass, which I painted with a watered down version of the Sailing Sky and then added some Vintage Photo Oxide Ink.

I wanted the Compass to have the look of a glass face. I poured a large amount of clear embossing powder in the centre of the Compass and melted it slowly.


I continued to do this until there was a good layer of clear embossing powder over the face of the Compass. I then added a couple of the Silver Mica flakes by melting the surface of the clear embossing powder and gently placing the flakes on the top. I then continued to melt the clear powder until the flakes started to sink in to the melted powder.


I added some silver sparkle to the Angel Wings too using Silver Embossing Powder.


I added some Natural Sisal to the centre of the background then added the Wings and Compass.


Here are some close-ups...


Thank you so much for popping by the Itsy Bitsy blog today to check out my creation. I love to hear your thoughts, so please leave a comment if you wish.
Toodles for now, 
Lisa xxx 


Here are all the Itsy Bitsy products I used...


I would like to enter this in to the following challenges...

Sandee and Amelie's steampunk challenge - September 2018 Challenge
Creative Artiste Mixed Media Cahllenge Blog - #42