Wednesday 25 April 2018

The Artistic Stamper Birds and Bees theme... with a twist

Hi folks, I'm here with another creation for the Birds and Bees theme this month. But with a twist... I've used butterflies.

I used The Artistic Stamper A5 Insects and Butterflies stamp set, which has a gorgeous collection of winged creatures. 

On my last creation for this theme I used birds and the previous one, I used bees. So, this time I went with a more pretty version of a winged creature - butterflies. I love butterflies! I have quite a wide variety of butterfly stamps and even though I have many, I still continue to collect them, as you can never have enough!!!

Here is my creation...


I coloured a piece of white card with Distress Inks using Mustard Seed, Cracked Pistachio and Blueprint Sketch. 

I then sprayed the inked background with water and left to dry.


I used The Artistic Stamper 3 x 3 Harlequin Mask with the same colours of ink to add some depth.


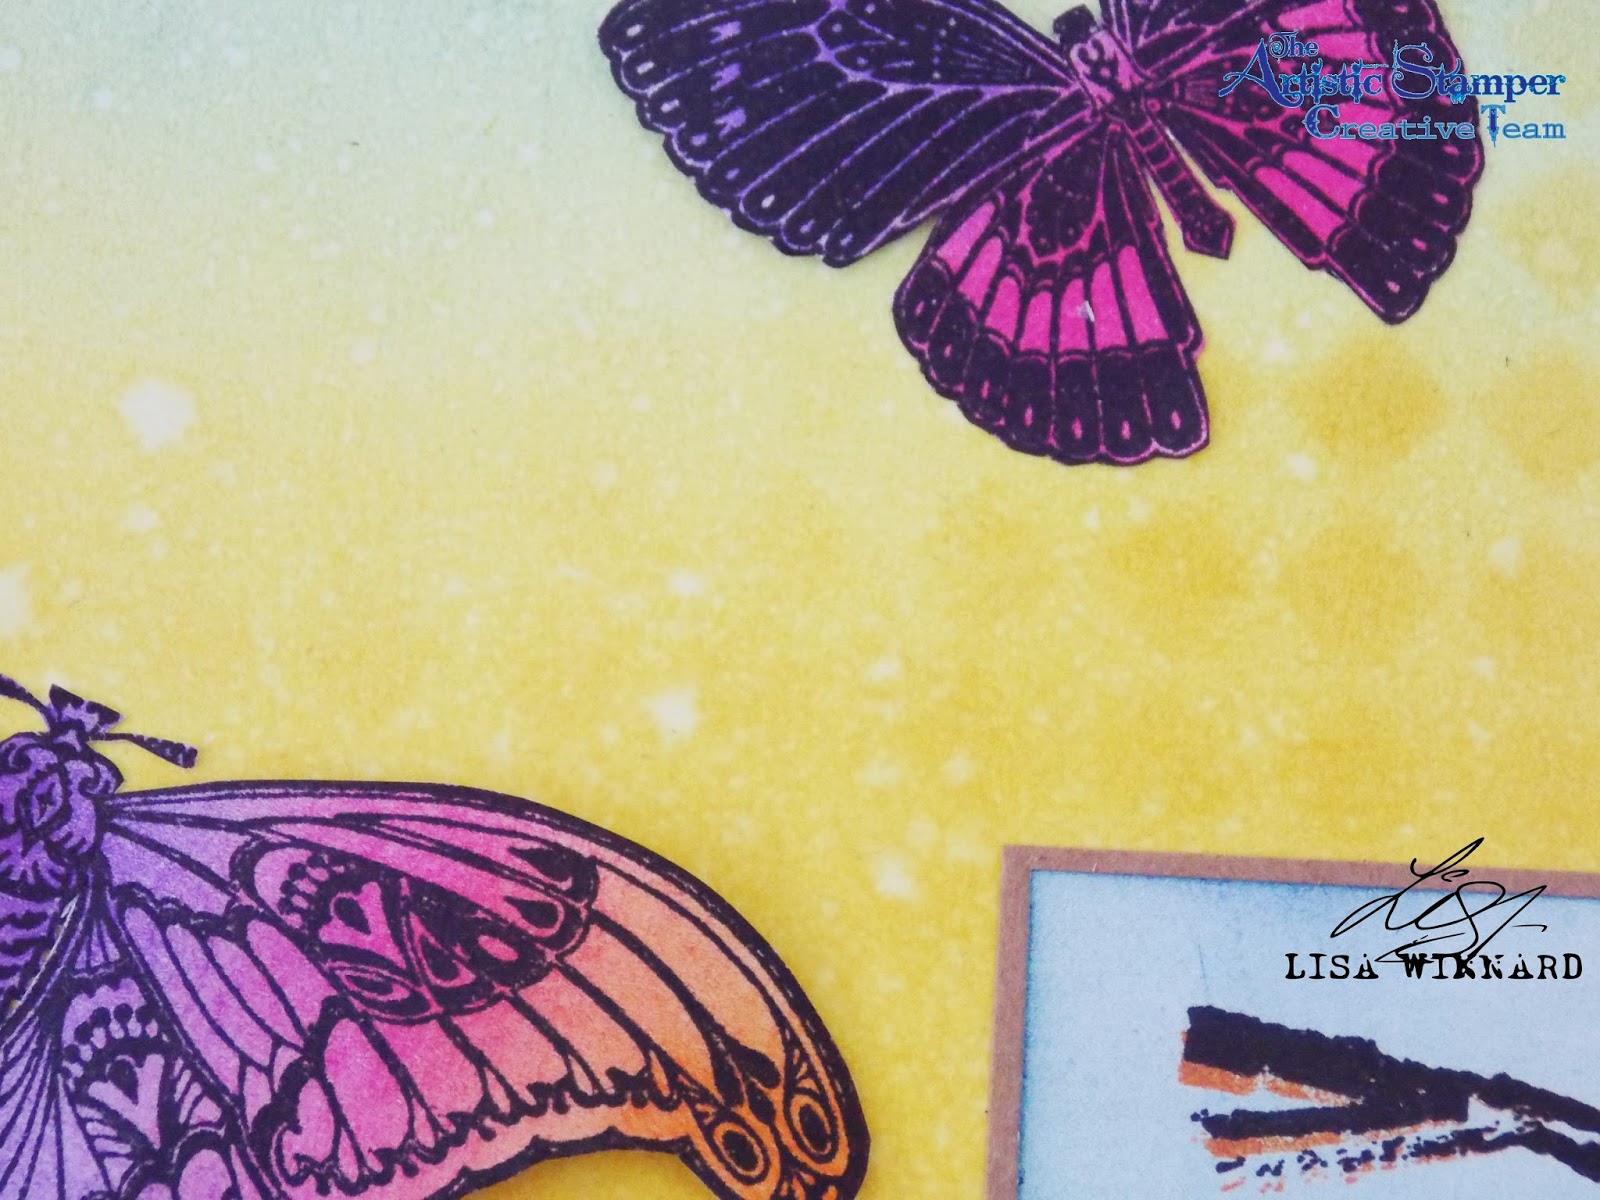
I then stamped the butterflies from the Insects and Butterflies stamp set on to white card and coloured them them with Carved Pumpkin, Wilted Violet and Picked Raspberry Distress Inks.

I adhered the butterflies at different heights coming off the background.

I then stamped the word 'fly' using black Versafine ink then 
over-stamped with Carved Pumpkin Distress Ink, and lightly brushed Blueprint Sketch ink over the top. I matted the word on to Kraft Card and glued it to the  bottom corner of the background.


To finish, I matted the background on to Kraft Card.


Thanks for popping by.
Toodles for now,
Lisa xxx


The stamps and stencil I have used are available on The Artistic Stamper website


Insects and Butterflies 1 A5  (cut out and mounted on cling cushioning)   The Artistic Stamper Mask Harlequin 3" X 3"      Decay Alphabet lower case size A5 (cut out and mounted on cling cushioning)

Tuesday 17 April 2018

Mixed Media Bottle - My 1st Itsy Bitsy Design Team project

Hello everyone, welcome to my first post as part of the Itsy Bitsy Design Team. 


As you probably know, I have a big interest in mixed media and altered art. I love turning something  that is ordinary or boring into something that is amazing and different with a bit of imagination and fantastic products.


So, for my first project, I decided to alter a glass bottle which is shaped like a lightbulb with a cork stopper.


Here are all the bits I used...


First, I put a small amount of the Little Birdie Grainy Texture Paste on to a non-stick mat and added a couple of drops of Little Birdie Frosted Pool Gold Alcohol Splash and mixed them together with a pallet knife. This created the gorgeous teal blue coloured texture paste. 


I applied it to the glass bottle with my finger rather than a pallet knife to add more texture and left it to dry.


I cut a piece of the handmade Burlap Ribbon approx 20cm and pulled the longer length of the Burlap apart . 


I put three lengths together and knotted them with the next three lengths to make a rope. 


I wrapped the rope around the middle and the neck of the glass bottle.


I chose a selection of Handmade Flowers to add decoration.


I added two of the Royal Ferns.


Then a Sea Foam Linen Paper flower to the neck of the bottle.


I added a flower from the Argyle Ocean Sparkle pack in the centre of the bottle.


Then I added some of the Teal Rustic Mini Daisies to the bottom and the neck of the bottle.


I made a second glass bottle with a lighter shade of blue grainy texture paste and have displayed them on my bookcase in the sitting room.


I do hope you like what I have done for my first project for the Itsy Bitsy Design Team and I hope I have inspired you to try some altered art.


If you would like to have a look at my project on the Itsy Bitsy Blog here is the link...  

For a toot on the Itsy Bitsy Website, the link is here...


Toodles for now,   
Lisa xxx


All the products I have used for this project are below.


Sunday 15 April 2018

Texture, texture, texture @ Tando Creative

Hello lovely peeps and welcome to my blog post for Tando Creative, This weeks theme is 'Texture'.


The Tando kit I used for this project was the Cogs Mega Pack and I threw a ton of DecoArt Media products at it to create some fabulous texture.

I used DecoArt crackle paint on the bigger background.


Then used DecoArt white modelling paste on the smaller background. 


I used DecoArt texture sand paste on the cogs.


When all the pastes where dry, I used DecoArt Premium Acrylic paints.

I used a stamp from the Stampers Anonymous Tim Holtz Sideshow stamp.


Thanks for popping by.
Toodles for now,
Lisa x

All the products I have used are available on the Tando Website.

I would like to enter this in to the following challenges:
Sandee & Amelie's steampunk challenge - steampunk/industrial

Tuesday 10 April 2018

Birds & Bees @ The Artistic Stamper

Hi lovely peeps! Welcome to today's blog post for The Artistic Stamper

This month's theme is 'Birds and Bees'. 


The stamps I used from The Artistic Stamper were Neil Walker's A6 Birdz set and Mini Backgrounds #3. 


I started with a white piece of card and added colour using Faber Castell Gelatos. I randomly added a collection of colours to the white card and added some water to blend the colours. 


I stamped one of the mini background stamps from set #3 using black Versafine Ink. I started with 2nd generation stamping so the ink wasn't too dark, and continued to stamp until the ink faded. 


I stamped the birds on to white card with black Versafine ink and heat embossed with black embossing powder. Then fussy cut them out.


Again, I used the same collection of gelatos to add colour to the birds. 

I added a phrase from Tim Holtz 'Small Talk' stickers.


To finish, I mounted the background on to white card to give it a frame, then mounted on to black.  


Thanks for popping by my blog today. 
Toodles for now,
Lisa xxx

If you would like to join in with the challenge, 

Here are the stamps I used...

Birdz Set A6  © Neil Walker (cut out and mounted on cling cushioning)MIni Backgrounds # 3 size A6  ( cut and  mounted on cling cushioning )


Sunday 1 April 2018

Honeycomb Spring with TAS

Hello folks and welcome to my post for The Artistic Stamper. The start of April comes a new Spring theme, "Birds and the Bees".

For this creation I used The Honeycomb Background stamp.


I used the Honeycomb Background stamp with a selection of Distress Inks to create the background, inking and stamping with the inks.


I then used the same stamp stamped with black ink and coloured with Distress Inks to create the top layer.


I applied 6 layers of clear embossing powder over the top then cracked the embossed layer to create texture. I cut in to 1 inch sections and mounted on to black card. 
I then stamped one of the bees in the stamp set, fussy cut and stuck with 3D foam dots. 


To finish I added a 7 Dots Studio sticker sentiment.


Honeycomb Background & Free Bees  (cut out and mounted on cling cushioning)


Thanks for popping by my blog today. 
Please leave a comment if you wish, 
I love to hear your thoughts.
Toodles for now,
Lisa xxx