Saturday 30 June 2018

I Just Want To Make Nice Things.....

Hi lovelies. Today's post is for Itsy Bitsy and I again, get to have fun playing with their stunningly gorgeous products which are growing by the minute. 

The team is concentrating on the beautiful chalk paints which are just brilliant and come in a rainbow of colours. 
I chose a 8" x 8" piece of greyboard to work on as I needed a sturdy background to add lots of lovely Itsy Bitsy mixed media products to. 

So... here is what I created....


I chose an 8" x 8" piece of greyboard to work on as I needed a sturdy background to add lots of lovely Itsy Bitsy mixed media products to.

I covered the greyboard with Little Birdie white textured cardstock using Little Birdie Craft glue. I then ripped up a sheet of the Little Birdie Vintage Reflections paper and glued bits of it to the base using the craft glue.


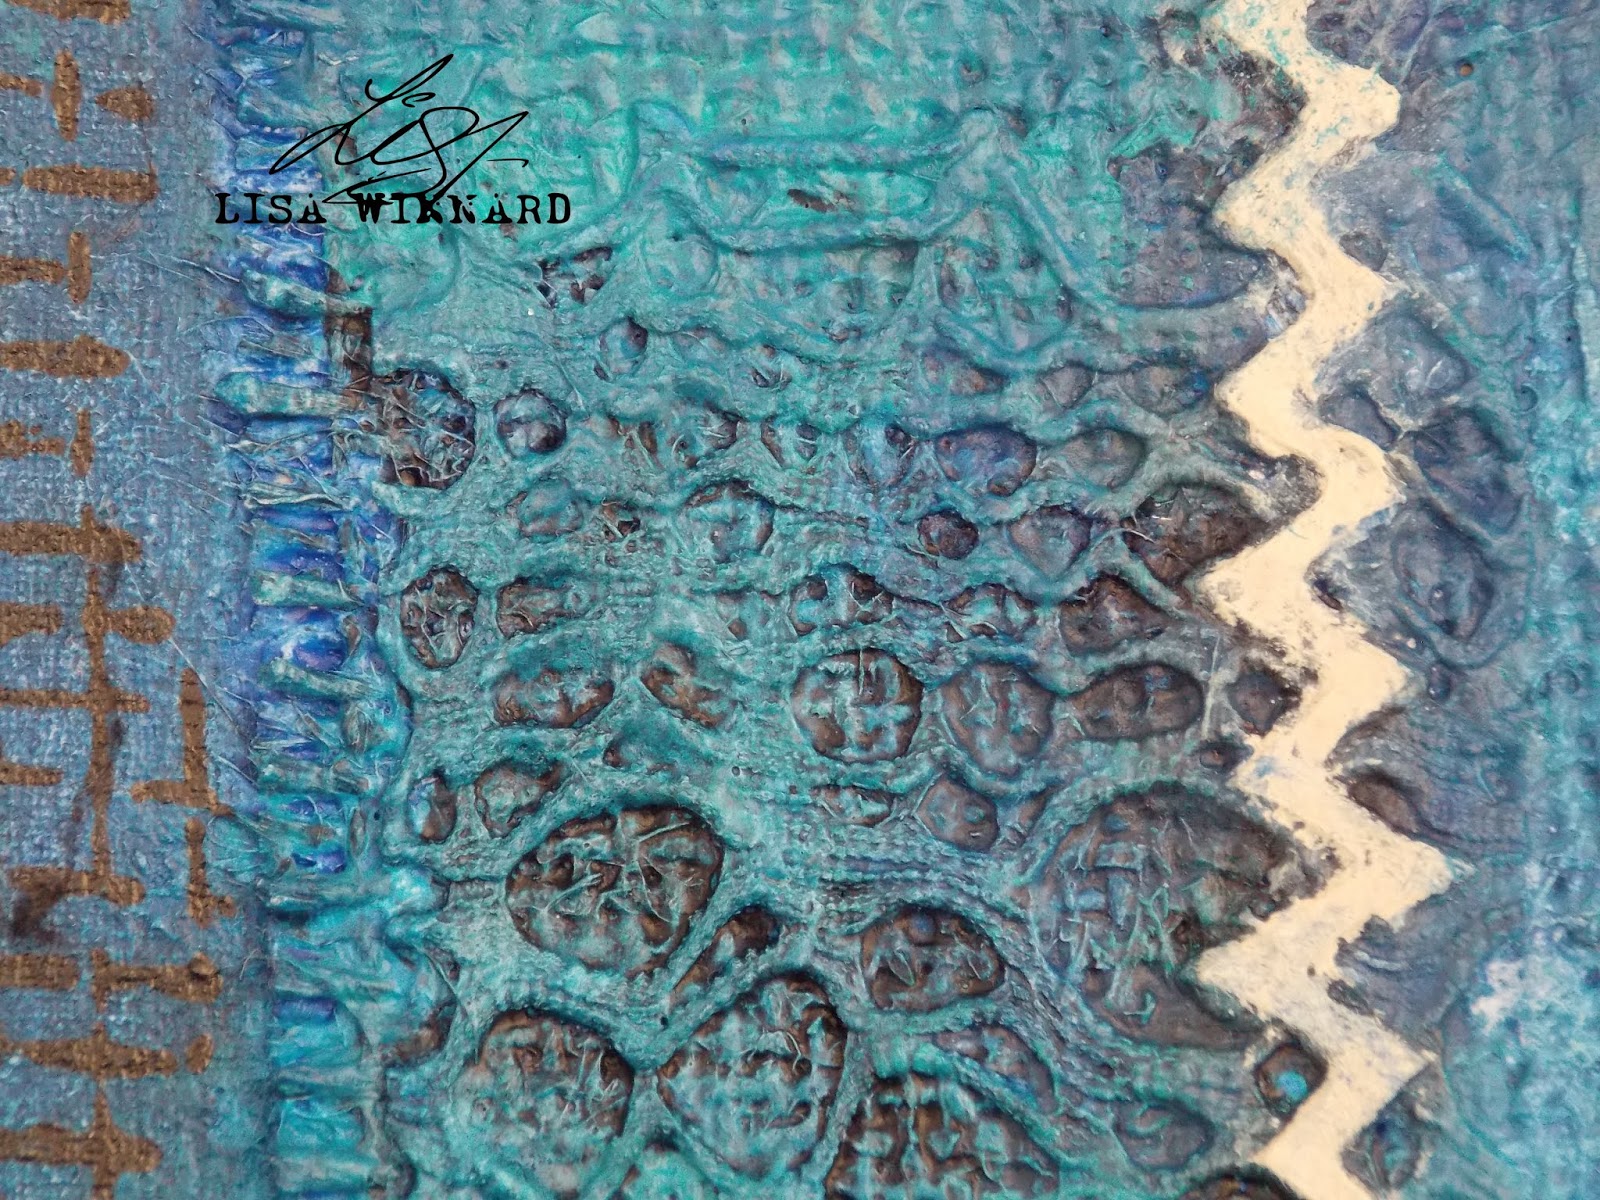
I added some texture using a stencil and Little Birdie Mixed Media Paste.


I then added more texture using Grainy Texture Paste applying it with my finger.


And added even more texture using the craft glue and Texture Sand.


When everything had dried, I painted the base using Little Birdie French Rose Chalk Paint. Then spraying with Mocha Colour Wash.


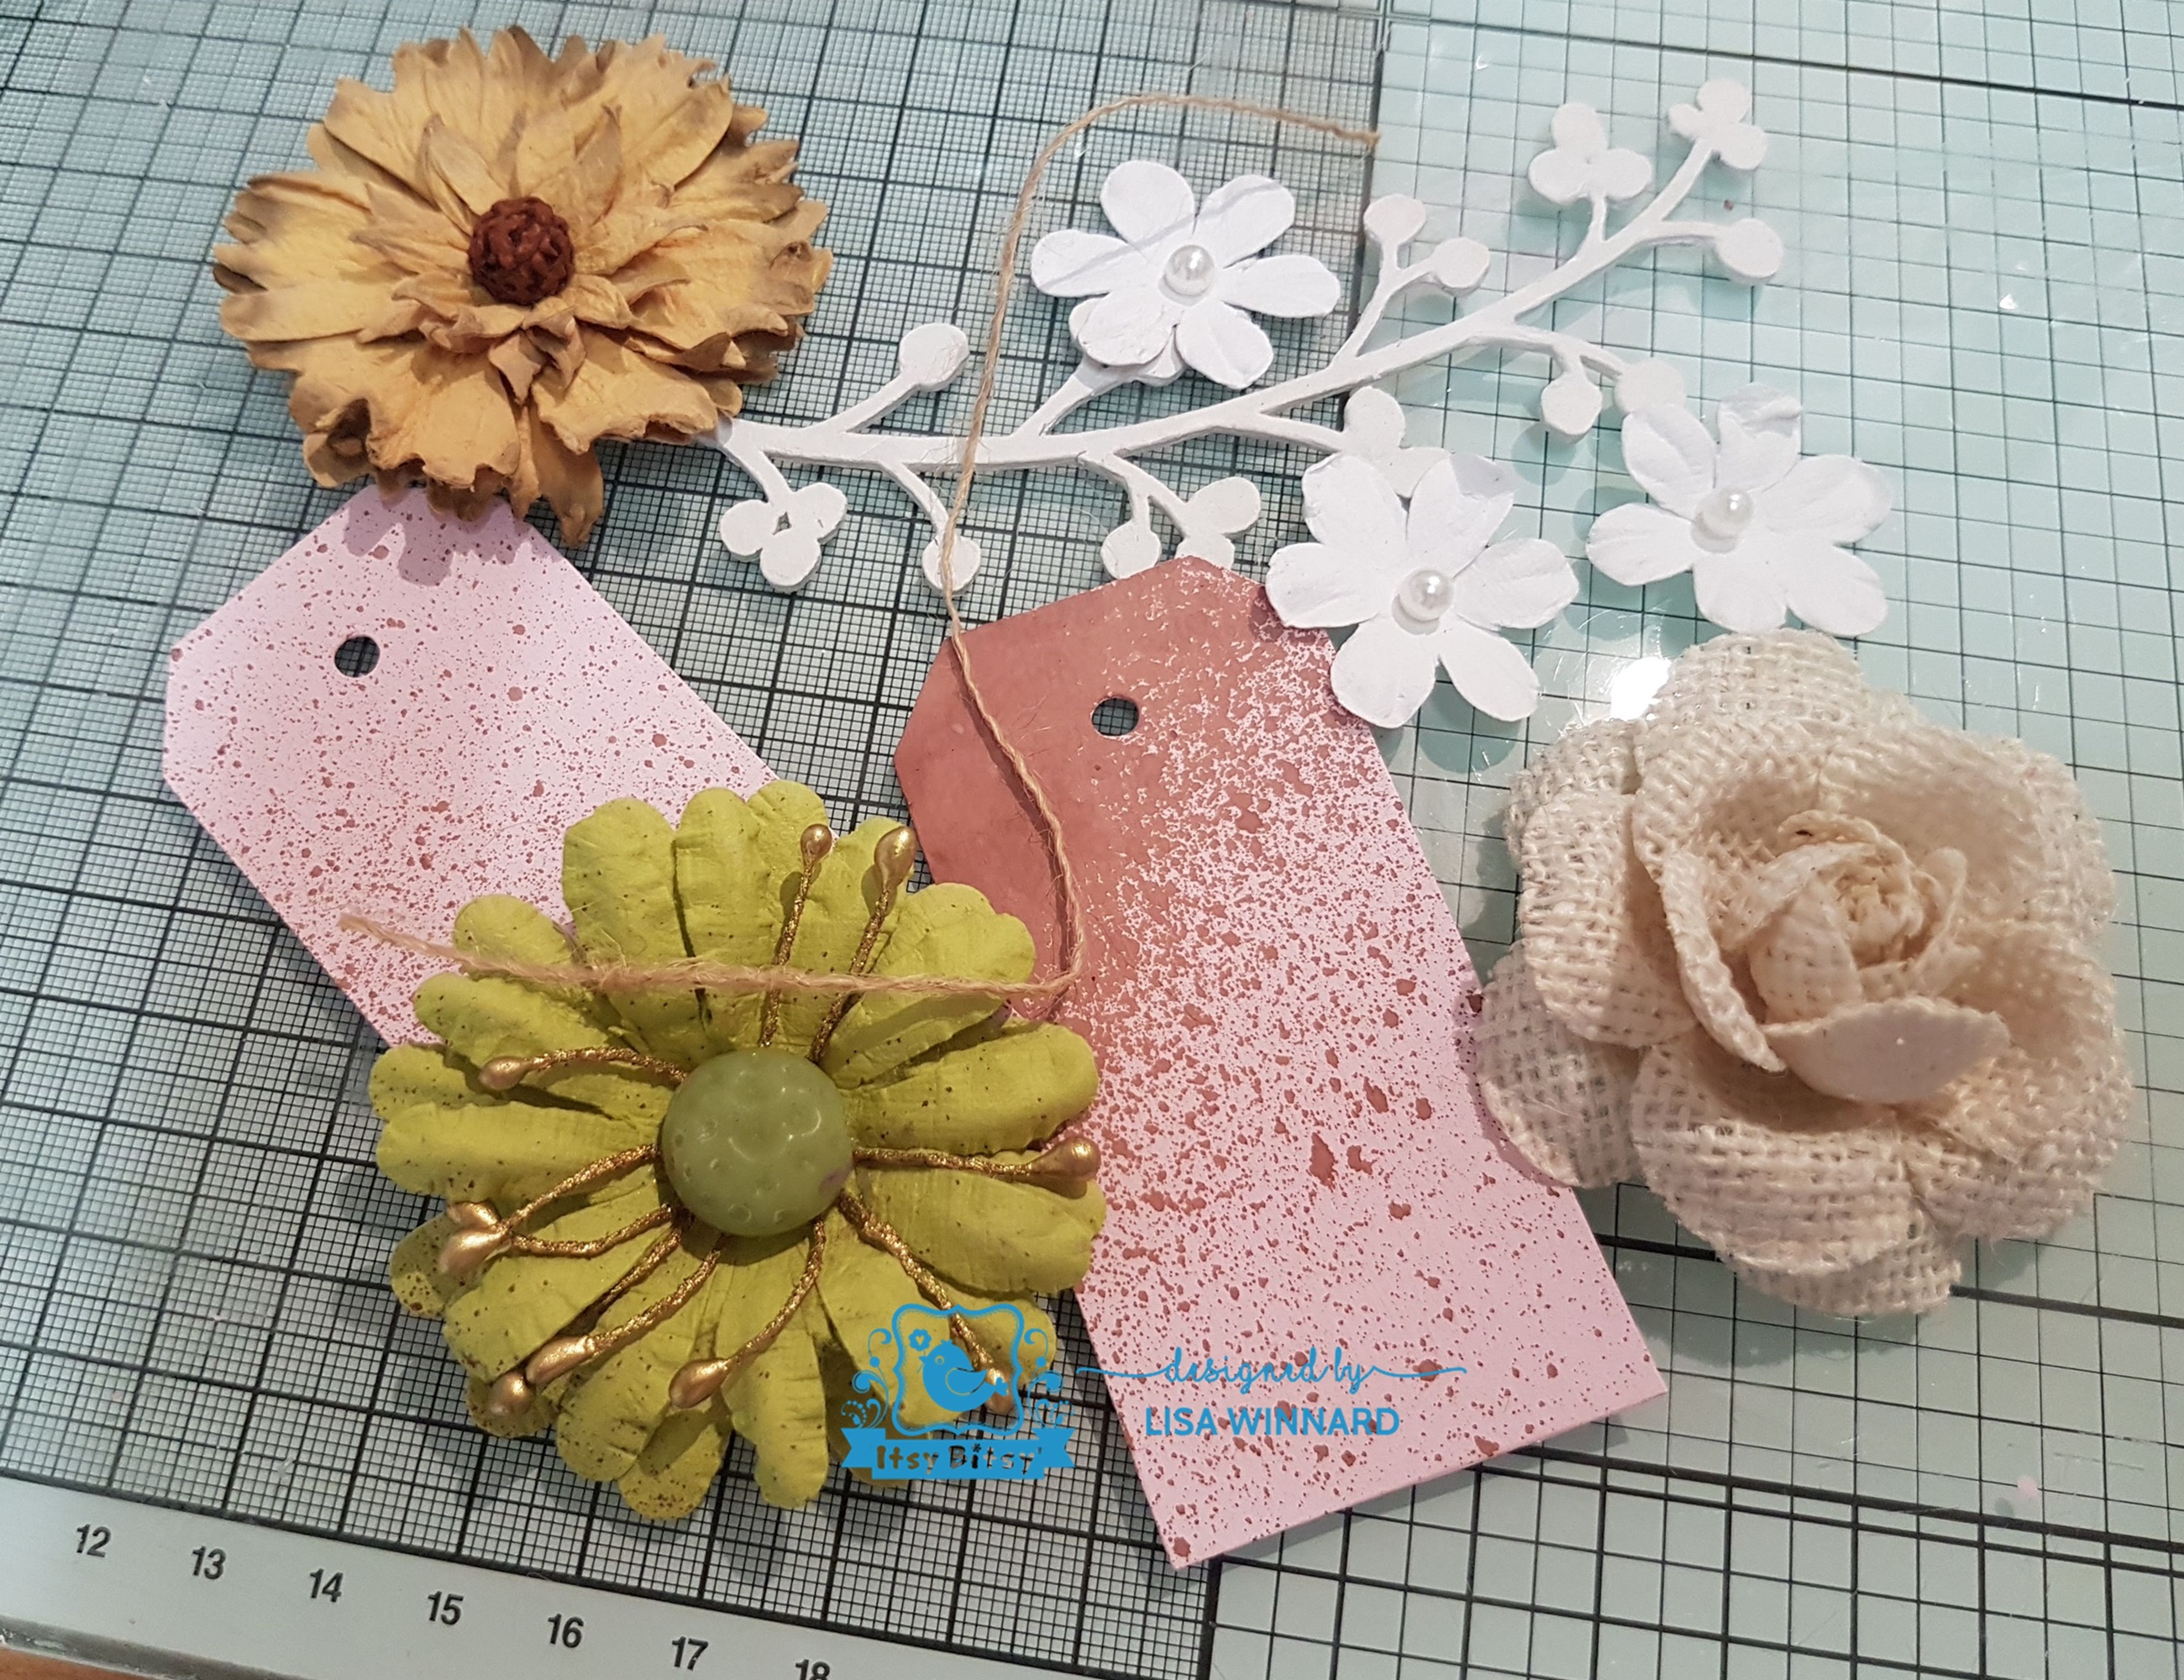
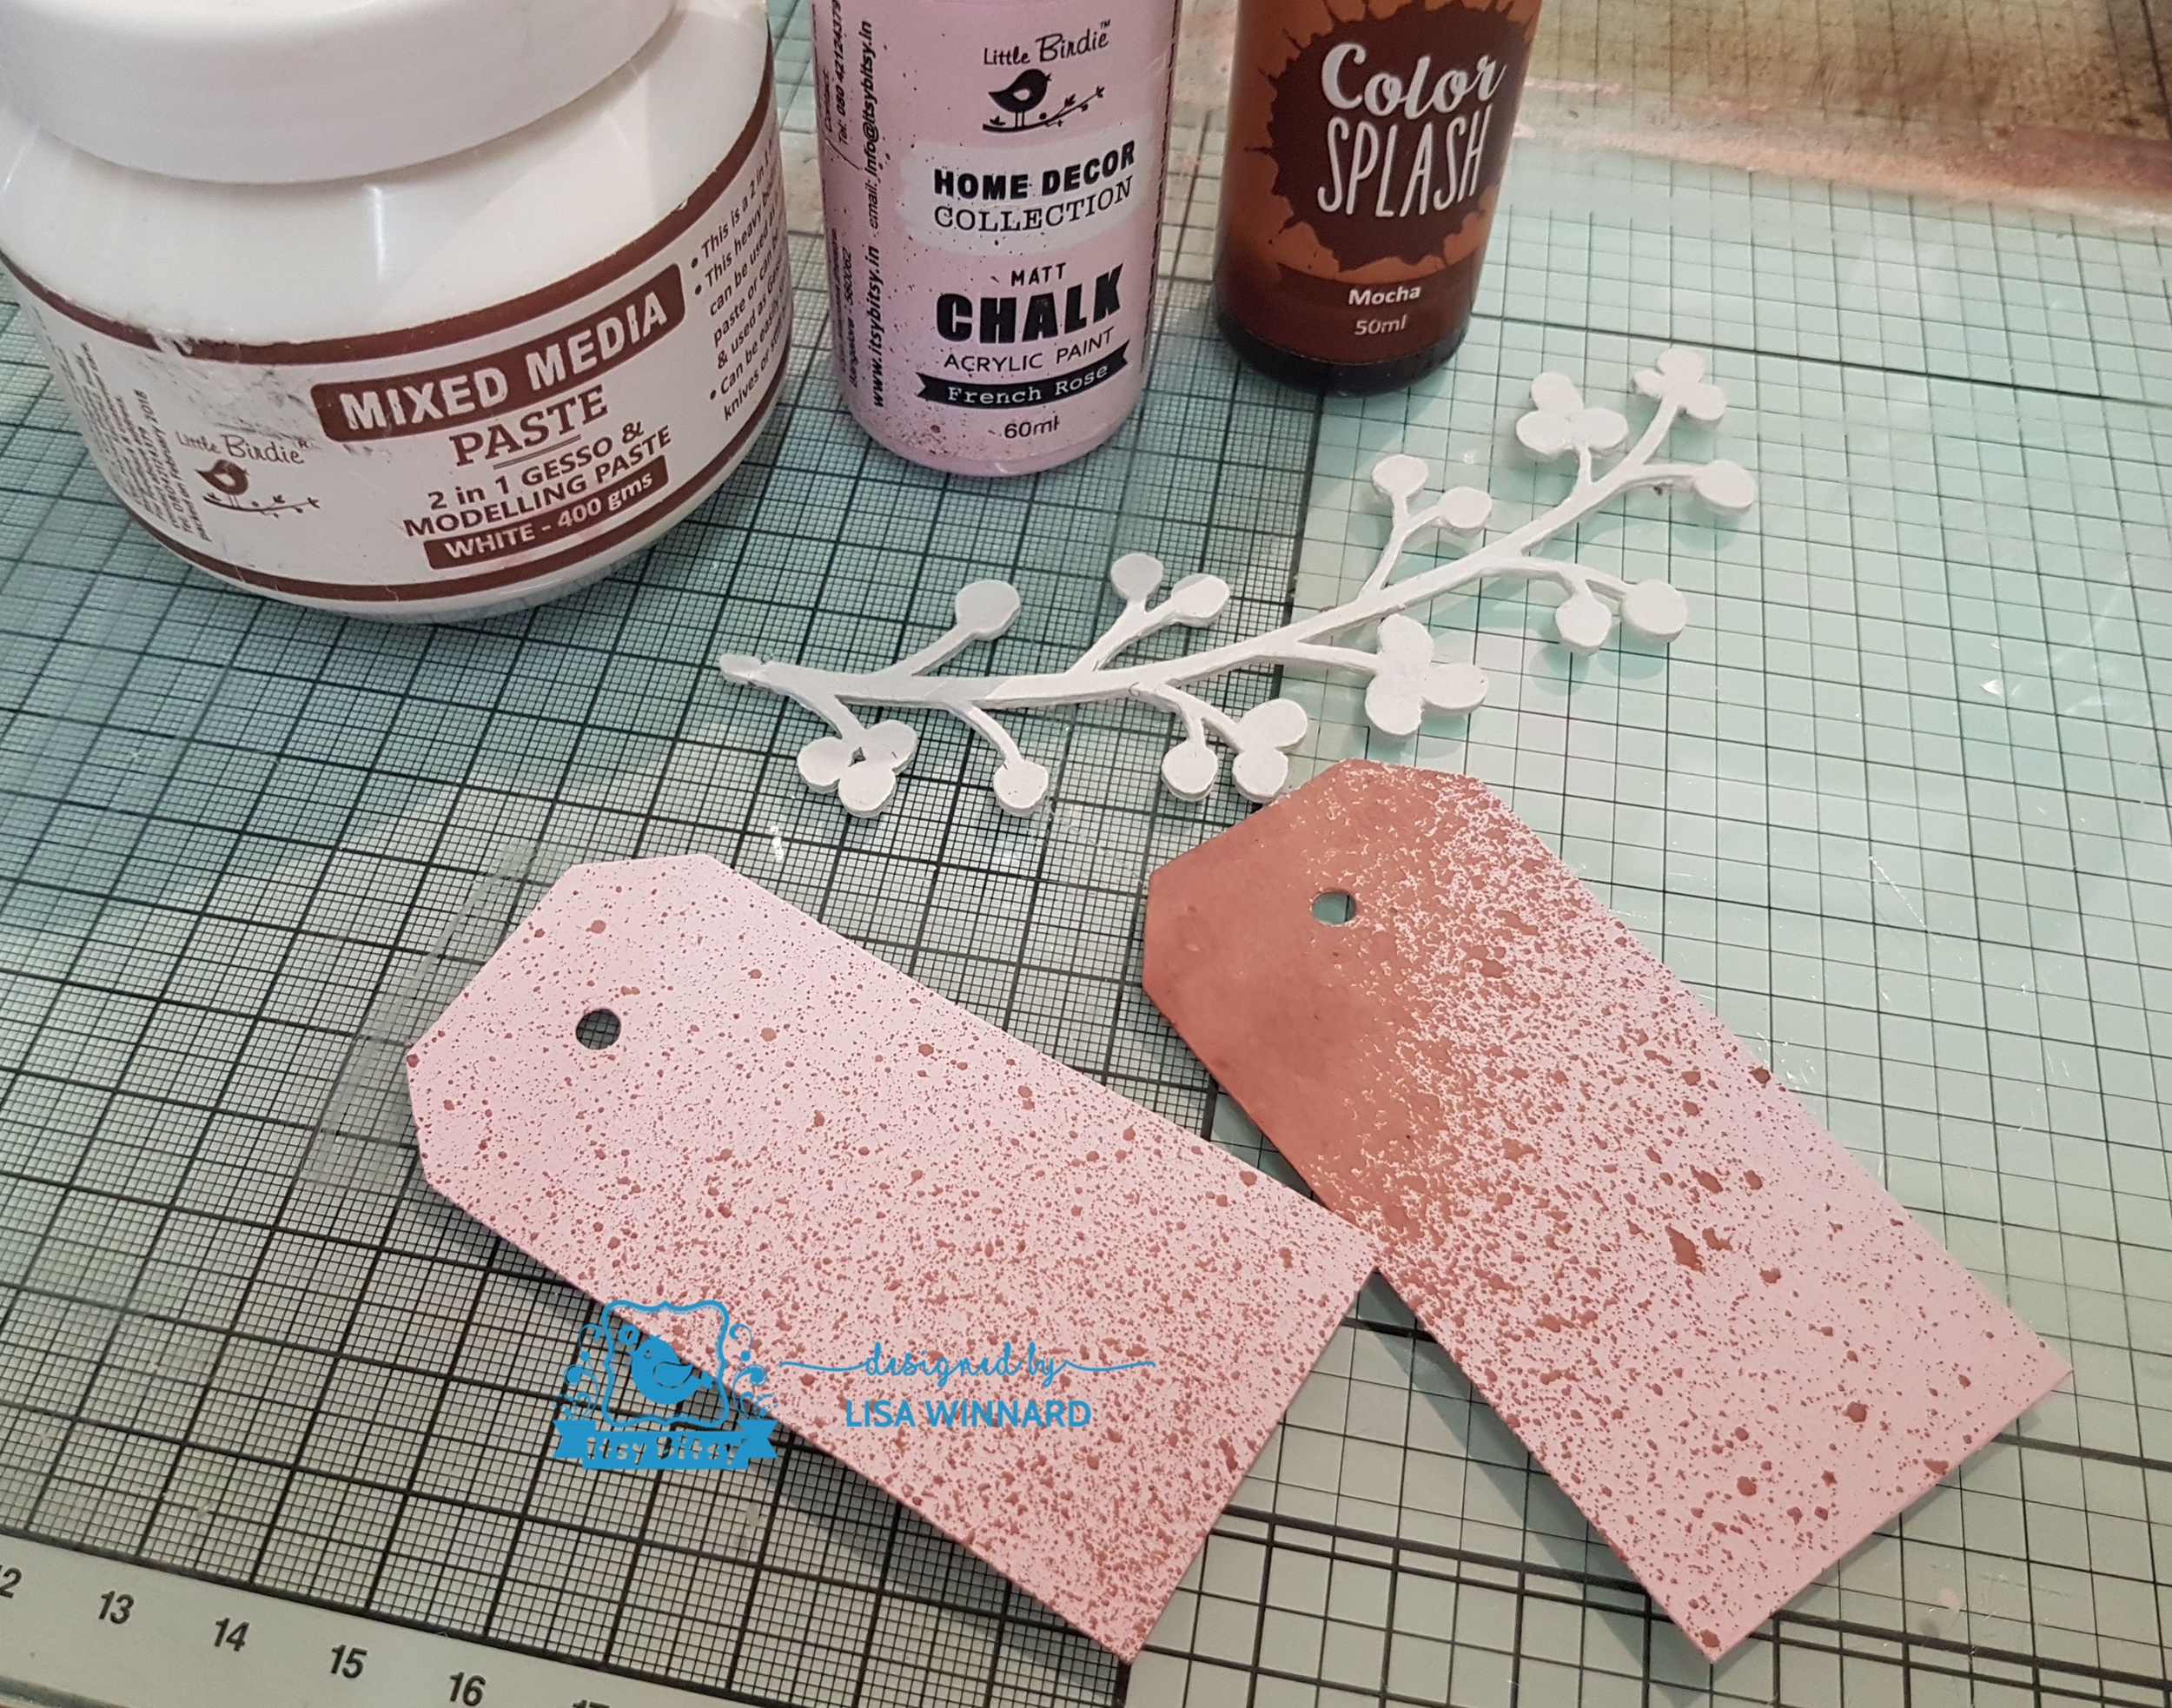
I painted one of the chipboard pieces from the Primed Chipboard Winter Berry pack white and two mini tags with the chalk paint and added a little of the Mocha Colour Wash to the tags.


I gathered the tags, chipboard piece and Little Birdie flowers and arranged them on the base. And a Tim Holtz words sticker.


Here are a few close ups....


Thanks for popping by my blog. Leave a comment if you wish, I love to hear your thoughts.
Toodles for now, Lisa xxx


Sunday 24 June 2018

Colour it Blue

Hi folks, today I am posting for 
The Artistic Stamper. 
The theme this month is 'Colour it Blue' which for me, is quite "normal" as blue tends to be the most popular colour I go to. (mmmm.... I think I need to stop doing that...


I chose the fabulously crazy Birdz stamp set by Neil Walker to play with. Along with a selection of 3 x 3 stencils and a selection of blue Oxide Distress Inks. 

I first used the stencils with the selection of blue inks on white card creating a background.


I then stamped the Birdz and coloured them in with the Oxide inks and water.


I then stamped the phrase 'free as a bird' using The Artistic Stamper Decay Alphabet stamp set. 


Everything I used is below and available on The Artistic Stamper Website.

Thanks for popping by.
Toodles for now,
Lisa xxx


Birdz Set A6  © Neil Walker (cut out and mounted on cling cushioning)       Decay Alphabet lower case size A5 (cut out and mounted on cling cushioning)      The Artistic Stamper Mask Harlequin 3" X 3"   The Artistic Stamper Mask Chevron 3" X 3"   The Artistic Stamper Mask Sequin Waste 3" X 3"

Real or Faux Fabric

Hi peeps, I'm here with my post for Tando Creative.
This weeks theme is 'real or faux fabric'.
I created an ATC (Artist Trading Card) or rather a LATC. Which is a LARGE ATC, which to be honest, is something I kinda made up.... as an ATC is traditionally 2.5" x 3.5" in size where mine is slightly bigger. So, I suppose you could be called a postcard??


I gathered a collection of different fabrics - canvas, cord, ribbons, burlap... and glued them to a piece of Tando greyboard.


When the fabric had dried, I painted the surface with DecoArt white Gesso. 


I used the Tando Stitches Group 15cm x 15cm stencil with DecoArt clear modelling paste to add some raised stitches. 


And some buttons. Then painted it with DecoArt Premium acrylics. 


Thanks For popping by.
Toodles for now,
Lisa xxx


Stitches Group Mask 15cm x 15cm


Friday 8 June 2018

Decoupage Paint Box with Itsy Bitsy

Hello everyone, I'm here with my most recent creation for the Itsy Bitsy design team. This month we have been looking at the stunning Itsy Bitsy decoupage papers. 

Have a toot on the Itsy Bitsy blog to see the other team members creations.

Here is my finished creation.


There is a fabulous range of excellent quality decoupage papers on the Itsy Bitsy website, a whole collection of beautiful colours, patterns, themes, vintage,  vibrant... to suit everyone's taste.
For my project I chose to work with the A4 Butterfly Chronicle decoupage sheets.


Here is the step by step process of how I created my project.


I started with a MDF wooden box a bit smaller than A4 in size which I painted with Itsy Bitsy 2 in 1 white gesso & modelling paste.


I painted the inside and the edges of the box with Wild Wasabi chalk paint.


I chose the decoupage paper I wanted to use on the lid of the box and adhered it using watered down craft glue.


I prefer to rub the paper with the flat of my hand to get all the bubbles from under the paper. I find this works better than using a paintbrush as a brush can sometimes be too harsh and can rip the paper. 


I added the decoupage around the sides of the box and left to dry. 
When the decoupage paper was fully dry, I cut off the excess with scissors then sanded the edges with sandpaper to get a nice neat edge to the sides and the lid of the box.


I added some brown ink to the edges of the box and the inside to give it a more antiqued, distressed look. 


I then added some of the Wild Wasabi chalk paint to the lid of the box.


Then I added splashes of Charcoal Colour Splash and Gold Nugget Alcohol Splash.


Now for the decoration. I intend this box to be a storage area for my excessive paintbrush collection. Yes, I admit I have more paintbrushes than a normal person needs yet it seems I can never find one when I need one! So hopefully this will be a safe place for my wondering paintbrushes. 


I took a large paintbrush and gave it a few coats of the white 2 in 1 gesso & modelling paste and let it dry.  I wanted to add lots of texture to the paintbrush and because the Itsy Bitsy gesso is a 2 in 1, the modelling paste allows some super texture to be added to a project.


I added a light touch of the Wild Wasabi chalk paint to the paintbrush.


Then added some Gold Nugget Alcohol Splash and some splashes of the Charcoal colour splash and left to dry.


Next, I took a small amount of the Texture Sand Stones and the Mixed Media Stones and put them on to a piece of old packaging. I added drips of the Gold Nugget Alcohol Splash to colour the sand and stones and left to dry. 


I added some of the Assorted Twisted Jute and wrapped it around the paintbrush using Soft Gel Medium to adhere it in areas. 


I chose the Little Birdie Flowers Asst 8pc to add to the box lid.


I arranged the flowers and added the Texture Sand and Mixed media stones to the paintbrush, some of the flower petals and to the box lid.


And here is the finished box with some close-ups.


Thank you so much for popping along to my blog today to see my creation. I hope you like it, leave me a comment to let me know what you think.
Toodles for now, 
Lisa xxx


Here are all the Itsy Bitsy products I used which are all available on the Itsy Bitsy Website.