Showing posts with label stencils. Show all posts

Wednesday, 17 July 2019

Dream Tag

Hello lovely people! I am here with an 'Anything Goes' for Tando Creative. For this project, I created a step by step of a one-layer tag using a selection of different 
Tando stencils. 


Step-by-step


Step 1 - Using DecoArt Premium Acrylic paints and a Tando greyboard tag, created a background using 3 different colours.


Step 2 - glue some torn book pages on to the tag.


step 3 - Using the DecoArt Premium Acrylics, stencil the tag using Tando Cogs Group 6x6 stencil


step 4 - stencil using the Tando 260mm x 65mm Numbers stencil.


Step 5 & 6 - rub the tag gently with a damp cloth to distress the stencilled areas.


Step 7 - add DecoArt Acrylic Titan Buff paint with water over the tag.


Step 8 - Using the Tando 4 x 4 Distressed Diamond to stencil the tag.


Step 9 - Using DecoArt Media Texture Sand Paste and Tando 4 x 4 Distressed Sequins Stencil the tag.


step 10 - Use DecoArt Premium paint (Paynes Grey) to colour the Texture Sand Paste.


Step 11 - Used Tando 260mm x 65mm Rings stencil on the tag.


Step 12 - Stamp the image on to the tag.


Step 13 - Colour a piece of card using Distress Oxide Ink and water.


Step 14 - Stamp the words on to the coloured card.


Step 15 - Cut out the word from the stamped sentiment.


Step 16 - Add the word to the tag.


FINAL TAG


Thanks for popping by,
Lisa x


Here are all the products I used which are available on the Tando Website.


Cogs Group Mask 15cm x 15cm   Stencil 260mm x 65mm: NUMBERS   Mini Mask - Distressed Diamond   Mini Mask - Distressed Sequins

Stencil 260mm x 65mm: RINGS      Paynes Grey Premium    10off Tags Size 5 120x60mm


Saturday, 24 March 2018

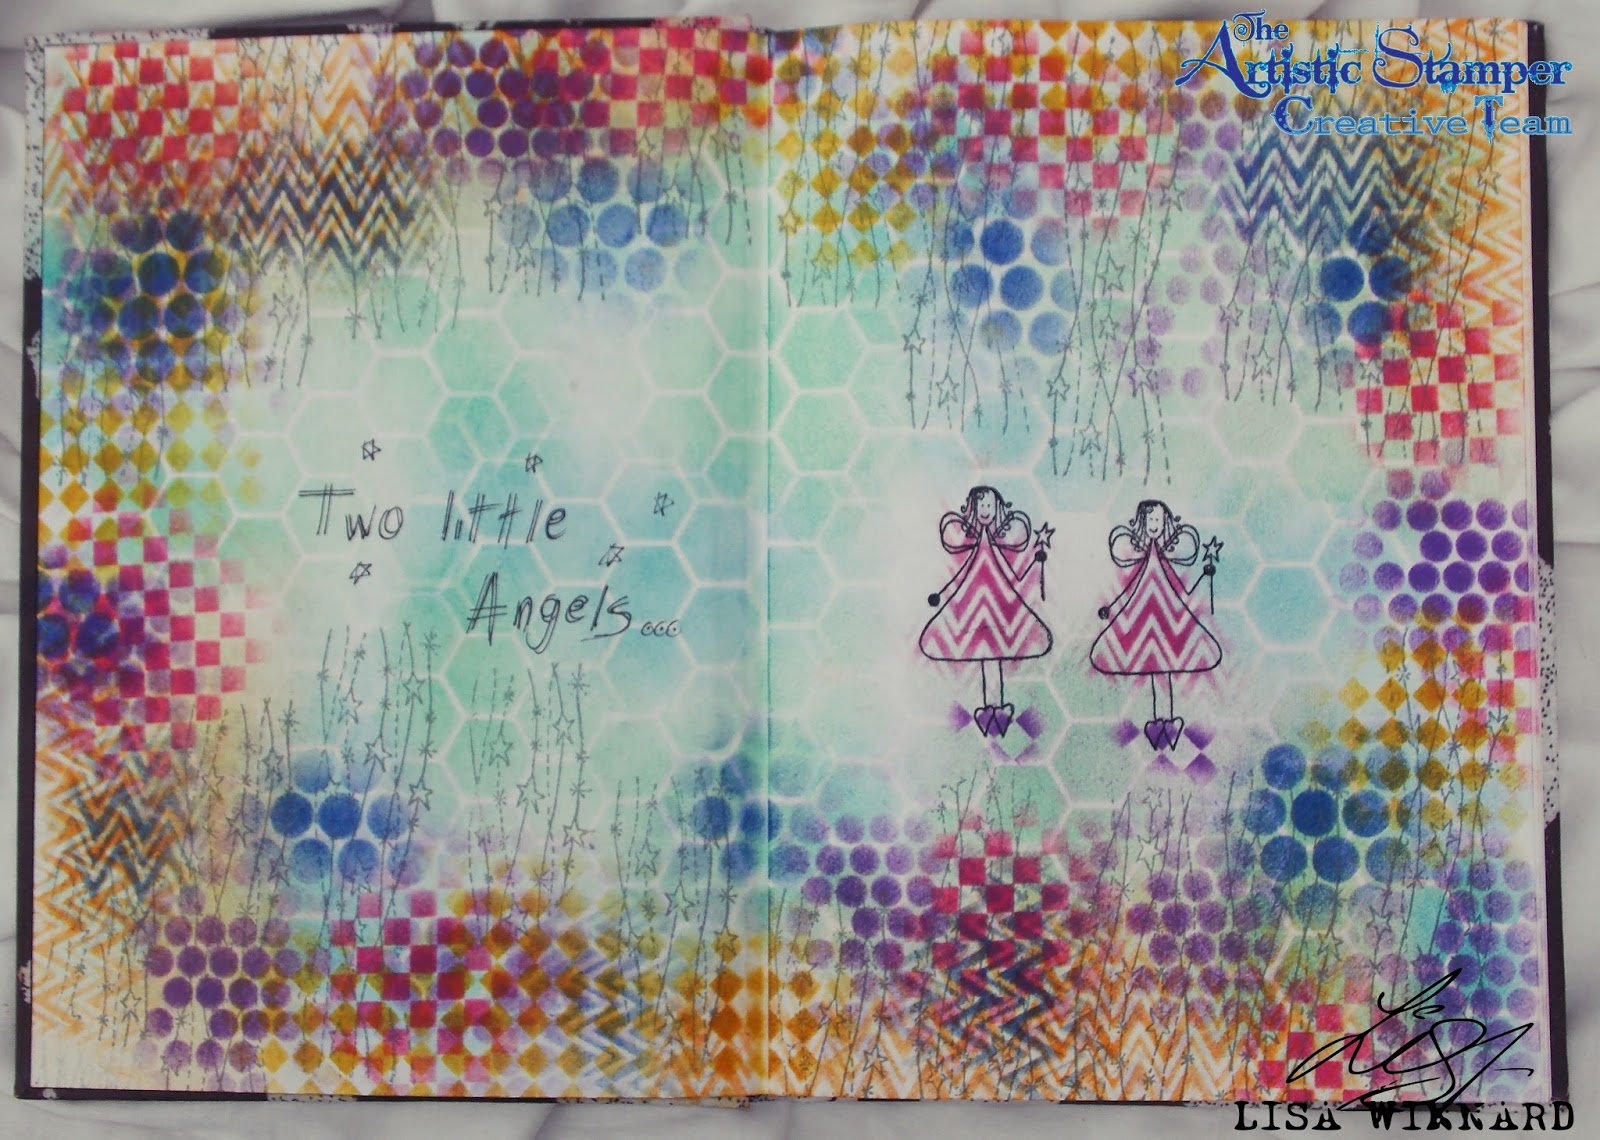
Sketchbooking with The Artistic Stamper Stencils

Hello folks and welcome to my post for The Artistic Stamper. This month our theme is Stencils.

I managed to get my hands on some more of the wonderful stencils at The Artistic Stamper and I had a right good play.
I have been persuading myself for the past couple of years now to try scrapbooking. And with multiple sketchbooks piling up I though lets try it....
So I grabbed one of my sketchbooks out of the pile, grabbed a handful of stencils and got to it. 

And here is the result...


The sketchbook I used has thick textured white pages, almost like recycled paper. So the ink tended to soak in to the pages more, but I like the faded, muted look it has given. 

The selection of stencils I used from The Artistic Stamper were the 3 x 3 Harlequin, 3 x 3 chevron, 3 x 3 sequin waste, 6 x 6 random dots and 6 x 6 honeycomb.


The Artistic Stamper Mask Harlequin 3" X 3"  The Artistic Stamper Mask Chevron 3" X 3"  The Artistic Stamper Mask Sequin Waste 3" X 3"   The Artistic Stamper Mask- Random Dots 6" x 6"  The Artistic Stamper mask-Honeycomb 6" x 6"  

I used a selection of Distress Oxide Inks to ink through the stencils.


I then wanted to add some stamping over the stencilled background. So I used The Artistic Stamper Artifacts Funky Fairy stamp and Artifacts Shooting Stars stamp.

Artifacts - Funky Fairy          Artifacts - Shooting Stars   


To finish I added some handwritten words. 

From taking the plunge in to scrapbooking, finally... I have realised it comes in the form of inspiration and creativity, not perfection. It doesn't have to be perfect, over the top and overly thought out to get it down on paper. 

I hope you like what I have done with The Artistic Stencils.
If you would like to leave a comment please do so, I love to hear your thoughts. 
Toodles for now,
Lisa xxx

Saturday, 10 March 2018

Stencils in Bloom @ The Artistic Stamper

Hi folks and welcome to my blog post for The Artist Stamper. 
This week the theme puts The Artistic Stamper stencils in the spotlight. 
I chose the 6 x 6 random dots stencil to use for this project.


I coloured the background of a white piece of card with Distress Oxide Inks then used the random dots mask with some white texture paste, which I coloured with one of the inks I used for the background.


I used the same mask with more texture paste on a small greyboard tag and added colour with the ink


I coloured some flowers with the Oxide Inks and added them to the tag with some sisal.


I stamped the word 'bloom' with the decay alphabet stamp set on to a white piece of card then inked the edges to match the colour palette.


Thanks for popping by my blog today. 
Leave a comment if you wish, I love to hear your thoughts. 
Toodles for now,
Lisa xxx 


Here are The Artistic Stamper products I used... which are available on the website.


The Artistic Stamper Mask- Random Dots 6" x 6"     Decay Alphabet lower case size A5 (cut out and mounted on cling cushioning)