Friday, 20 December 2013

DIGITALLY SWEET - challenge #67

This week at Digitally Sweet was quite a challenging one. I've had two poorly daughters who seem to have caught ever germ they could get their little mitts on over the past few weeks. So, unfortunately this weeks challenge was a last minute creation. But, I am still rather pleased with it.

This weeks challenge is sponsored by Template Dreams... 

and we also had an inspiration photo to work from.


As I am not fully confident going 100% digital, I prefer to 'stick to what I know' and go 50/50. I chose a personal photograph to work with and played about with the colours and size before printing on to photography paper. 
Here is my creation....


I used a photo of my eldest daughter and Papa (my Dad) putting the fairy on the Christmas tree which was taken last year.

This is my favourite Christmas moment. It's a family tradition in which me and my sister used to take it in turns every year putting the last decoration on the top of the tree. Now, my daughters have seemed to take over the job!! 


I wanted to use colour on the background and embellishments to keep the focus on the photograph being black & white. 
I cut a piece of watercolour card to 7" X 7" and inked it with a few different Christmasy colours. I stamped a border edge down one side and inked the opposite corner and bottom edge with clear embossing ink. Then heat embossed it using sparkly powder.

I arranged the photograph at an angle in the center. I tided a wide piece of lime green ribbon in a double knot and did the same with a thin piece of red ribbon and added them to the opposite corners. 

I die cut the numbers 2 & 5 and inked them using red ink, then embossed December using my Dymo and arranged in the top corner and in the opposite corner, used silk holly leaves and black berries. 


I thought I might use this as a calender page as I always buy a personal one of the kiddies for the grandparents but this year thought I might do a handmade one. So this is my December. 

To create this...
* watercolour card
* personal photo
* border stamp
* Distress inks - Vintage Photo, Peeled Paint
* Other inks - clear, True Red 
* snowflake sparkle embossing powder
* ribbon
* die cut numbers
* Dymo
* silk leaves, berries

Thanks for visiting my blog today. Please leave a comment if you wish - I do read them all and they inspire me to create.
Lis xxx 

Sunday, 15 December 2013

BAH HUMBUG - OSAAT challenge #194

It's our last challenge till next year at OSAAT and to finish of the year of 2013..... 

My image this week was.... Bah Humbug.


I wanted to stick to a monochrome colour palette with this image so chose a black/white/grey theme.

I used my new but-getting-a-lot-of-wear-out-of-them watercolour pencils to colour in the image.


I cut round the image using my EK Success Circle Scissor Pro (Love this tool!) And then using two different black and white pattern card, cut out expanding circles to create layers. 


I cut a background piece of white paper, tore and crinkle around the edges and inked it. 
Then layered it on to the same patterned card.


I tied a knot using silver wired mesh ribbon and black satin ribbon together. 


I used my Dymo to emboss the words 'Bah Humbug'.


I loved using this image as it was so different than the cutesy, traditional, father Christmas image you usually see.


All in all, a perfect finish to 2013's OSAAT creations.

Ingredients:
* Watercolour Pencils
* Patterned paper
* Distress Ink - Pumice Stone
* Ribbon
* Dymo embossing machine


This weeks challenge is sponsored by StitchyBear Digi Outlet will run up to 11th January 2014 10pm GMT (that's 5 whole weeks) so you have plenty of time to get cracking with your creations.

The winner of the challenge get all the images the DT used for challenge #192.
Have a look on the blog for some fabulous inspiration by the Design Team here.


Thanks for popping by and I hope to see you in the new year over at OSAAT. Please feel free to leave me a comment. Lis xxx

I would like to enter this creation in to the following challenges:

Digi Galore - anything goes
Crafty Hands - seasons greetings/winter theme
Challenges 4 Everybody - anything goes
Come and get it challenges - Christmas challenge
Dream Valley Challenges - Christmas
Here Come The Boys - anything goes for the boys

Friday, 13 December 2013

DIGITALLY SWEET - challenge #66

For this weeks Design Team challenge at Digitally Sweet I used a gorgeous vintage Merry Christmas image from Lunagirl.com


We had an inspiration image to work from.


And here is the image I chose from Lunagirl.


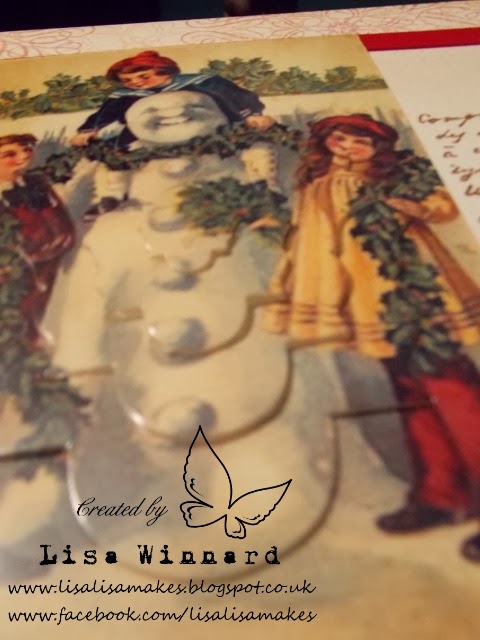
This image reminded me of a vintage postcard, and so this was what I went with. I decided to create a holiday postcard.

And this is my creation...


First, I chose to work on watercolour card so when I was stamping, it created a softer look.
I masked off a section at the top and bottom of the page and stamped a snowflake image using two different shades of pink.


I added two strips of red ribbon to the top and bottom.

I die cut the image using the whole set of Spellbinders dies to create a decoupage. I inked each section then decoupaged it using foam pads.


On the other side of the paper, I stamped a script stamp using brown ink rather than 
black. 


I cut out a old postage stamp from a book and stamped the postage stamp over the top then on the bottom of the page. 


Ingredients:
* Gorgeous vintage image from Lunagirl
* Snowflake stamp
* Script stamp
* Postmark stamp
* Distress Ink - Victorian Velvet, Tattered Rose, Vintage Photo
* Spellbinders die set
* Red Ribbon
* Stamp from book

Hope you like my take on a vintage postcard.
Please leave me a comment with your thoughts. See you soon, Lis xxx


Friday, 6 December 2013

DIGITALLY SWEET - challenge #65

Another fabulous week at Digitally Sweet
Challenges and I'm really enjoying my time here. I had another wonderful image to play with again this week... 

...Saint Nicholas himself. 

This weeks image comes courtesy of DigiDarla Designs.

You can find the image here


This week, I used my watercolour pencils to colour the image (I bought some new watercolour pencils a couple of weeks ago and can't stop using them!)and I think they look fab with this image as the colours aren't too bright, they are muted and keep the image looking vintage-y.


After colouring the image - I wanted to make a plaque rather than a card. 
I painted a piece of chipboard using olive green emulsion paint.


I stamped the chipboard using a scroll motif then heat embossed it using silver embossing powder. 


I also inked the edges of the board and embossed it using the same silver powder. After embossing, I inked over the top with the same stamp using vintage photo distress ink to give it a layered, muted effect.


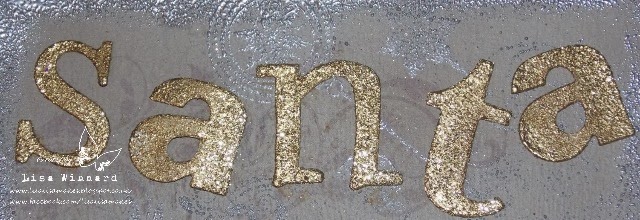
I spelled out the word s-a-n-t-a using die cut letters and also the numbers 2 & 5.


I covered them with clear ink and embossed them using gold powder. 


I stamped the poinsettia stamp several times on tan core'dinations card. I cut the whole flower out three times and cut the center of the flowers a further six times. 


I layered the flowers up and arranged them on the bottom of the plaque.


Another great week at Digitally Sweet. 


Ingredients:
* Watercolour pencils
* Piece of chipboard
* Floral/scroll motif stamp
* Embossing powder - gold & silver
* Distress Ink - Vintage Photo
* Poinsettia stamp
* Die cut letters/numbers
* Core'dinations card

Thanks for stopping by, please leave a comment if you wish.
Lis xxx


I would also like to enter my creation in the following challenge/s:

* Use numbers @ Hels Sheridan Blog

* Favourite Christmas colours @ TTPH

Wednesday, 4 December 2013

The 'NEW' Stamping Chef... featuring "Cogsley Copperpot"

Hello and welcome to a 'new' Stamping Chef!!
From the start of December, The Stamping Chef New Release team is now taking part in the weekly challenges. We have been split in to two teams - A & B and each team are now posting fortnightly.

We also have a new look WEBSITE at: www.thestampingchef.com where you can go directly to the BLOG or join in with the CHALLENGES. We also have a fab FORUM where you can find tips and techniques and all the available challenges along with having a chatter, THE GALLERY, where you can find loads of inspiration. And of course, access to the STORE where you can find all they fabulous designs you could dream of!

This is what you will see at the new website.....

Quick links below:

WEBSITE

BLOG
FORUM
STORE
CHALLENGES 
GALLERY


Now... back to the 1st Team A challenge...
As there isn't a 'new releases' team anymore, we all get to chose which ever image from the store we like. I think this is a fabulous idea and an amazing opportunity to go back to some of the older designs the new releases team never got to play with.... And there are so many amazing designs to chose from.

For my 1st Team A challenge, I chose "Cogsley Copperpot". (You can find it here from the store)


Cogsley Copperpot is a Steampunk image design so I decided to go with a sepia colour palette. I love working with different tones of the same colour and I think it works really well with this image.


I coloured in the image using ProMarkers and cut round it, inking the edges with Distress Inks.


I used a piece of diamond patterned Kanban paper for my main background card.

I took two pieces of Core'dinations card - a tan strip and a brown square. I embossed them using two different embossing folders - the brown one with circles and dots, the tan one with cogs. I sanded them really intensely to show most of the colour underneath and give it a really distressed, grungy look. I wrapped ribbon around the tan piece and added a piece of lace to the corner of the brown piece to keep the colours and patterns feminine. 


I took a ready-made bronze plaque with gold edging and stamped 'Happy Birthday' at the bottom. (I held the stamp down for a long time to create a smudged effect with the sentiment)


I adhered the image to the left of the card with foam pads to raise it, and attached the plaque to the opposite side at an angle.


To finish, I added a huge paper rose and some mini watch cogs to the top of the plaque.


This was such a super cool image to use as I am a huge Steampunk fan.


Although Steampunk can be seen as a very masculine theme. I think it works really well with the colours and embellishments I've used to make it feminine. 


Ingredients....

* ProMarkers -

caramel, cinnamon, henna, sandstone, vanilla, sunflower, blossom
* Vintage Photo Distress Ink
* Watch cogs/parts
* Ribbon & lace
* Plaque
* Selection of card
* Embossing folders
* Sandpaper
* foam pads 
* Large paper rose


Thanks for looking today and I hope you pop back soon. Lis xxx 

Sunday, 1 December 2013

Twit Twoo - OSAAT challenge #192


This weeks challenge at One Stitch At A Time was my turn to choose an image, and I picked the Owl from Sentimental Susan.


This weeks theme is: use a digi and is sponsored by the Stitchy Bear Digi Outlet and the winners prize is all the images the DT used in challenge #190.


Here is my creation.


This week I wanted to try something different, as the image had quite large sections to make up the picture, I decided to do a bit of paper piecing.


I printed the image twice and cut out each section. I went through the scrap box and found suitable bits of paper and card.

I then covered each section with the chosen paper and cut it out again and inked around the edges with Vintage Photo Distress Ink. When all the sections were covered in the chosen paper I then put the image back together by sticking it on to the other printed image. I stuck some pieces flat and added foam pads to other sections to make the image more 3D.


I stuck the image on to a piece of card with a wood grain effect, then on to a kraft card blank. I finished by added jute string down one edge.


Ingredients:
* Image
* Selection of paper and card
* Vintage Photo Distress Ink
* Foam Pads

Thanks for having a toot twit twoo today..... leave me a comment, let me know your thoughts.....
Hope to see you soon, Lis xxx