Tuesday, 5 June 2018

"Live Every Moment" with Itsy Bitsy

Hello lovelies. Here is my newest creation for the Itsy Bitsy Design Team.

For this project I kept my focus on the gorgeous Itsy Bitsy decoupage papers. The hardest part is choosing which of the papers to use as there are so many different designs and they are all stunning!!

I chose the Timeless Beauty decoupage papers. There are 4 A4 sheets in the pack with two designs and two sheets of each design.
I also wanted to use the Little Birdie "Live Every Moment" Primed Chipboard and I thought the decoupage sheet with the clocks would match well.


So, here is a step by step of what I did.


First, I chose a substrate that I wanted to work on which was a MDF wooden tray with side handles, just less than A4 in size, which I painted with the White Mixed Media 2 in 1 Modelling Paste and Gesso.


I added some texture using Grainy Texture Paste with the mixed media Net stencil along the outside sides of the tray.  When the texture paint had dried, I painted the tray with French Rose chalk paint then added some Vintage Photo Distress Oxide ink to add a vintage look to the tray.


Next I measured and cut one of the A4 sheets of the "Timeless Beauty" decoupage paper and adhered it to the inside bottom of the tray using Little Birdie Craft Glue. When the decoupage had dried, I added some Mocha Colour Splash around the edge.


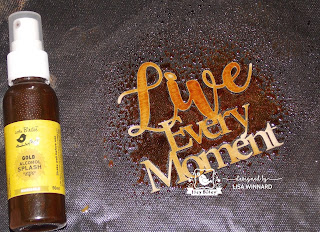
The next step I used Marigold Alcohol Splash to colour the Primed Chipboard and some Mixed Media Stones.


While the chipboard and stones were drying. I had the difficult choice of picking some of stunning Little Birdie flowers to decorate the tray with. Just like the decoupage papers, it is hard to choose as they are all such beautifully handmade in a rainbow of colours.
I used a selection of Lucinda Blush Flowers and Spanish Moss Symphony Flowers .


I also added some Hummingbird Craft Stickers and the Mixed Media Stones.


Thank you for popping by the Itsy Bitsy blog to see my creation. All the products I used are below.

 I hope I inspired you to get creative with Mixed Media.
Toodles for now,
Lisa x


Sunday, 27 May 2018

Same... But Different @ Tando

Hi folks, today's post is for one of my favourite themes at Tando. This week it is the same but different week.
The team gets the same Tando kit to play with to see what different ideas we come up with. It is so fun to see what everyone does with the exact same kit.


The kit included a mixed media board, Andy Skinner's phone dials and word panels 1.

I started with applying modelling paste over the Andy Skinner distressed digits stencil to the mixed media board. After it had dried I painted it and the phone dial with DecoArt Premium Acrylic Paints. 


I added some blue ink to the numbers sheet included with the phone dials then added some DecoArt crackle glaze over the top and on the dial. 


I used some more modelling paste on a long tag then added the mixed media board in the centre of the tag.


I used the phrase 'Hang Fire' from the word panels 1, painted it with the Premium paints and added it to the bottom of the tag.


I then used some rusty wire, curled it around a paintbrush and added it to the tag. 


Thanks for popping by my blog today.
Toodles for now,
Lisa x 


Here are all the Tando products I used...

Word Panels 1   Andy Skinner Phone Dials   Media: Clear Crackle Glaze   Set of 5 Long Tags   Mixed Media Boards 74mm x 138mm   A Skinner Stencil - DISTRESSED DIGITS

Friday, 25 May 2018

Background Hello @ The Artistic Stamper

Hello folks, welcome to my latest creation for The Artistic Stamper. This month, our theme is 'backgrounds'.
Each member of TAS Design Team are working with the new collection of Tracy Scott background stamps. I used #8 in the collection. 


I started with some white card cut to 7" square and coloured it with a couple of different yellow Distress Oxide inks.


I cut a piece of white card to 4.5" square and used a couple of red Oxides and did the same with a rectangle piece of card with orange Oxides.


I used Tracy's Background #8 stamp and stamped the three pieces of card with the Oxides. 
I also used Mini Backgrounds #1 stamp set on the yellow piece of card which I stamped using a selection of the Oxide colours. 


I adhered the red square on to the yellow background. I used foam pads to attach the orange rectangle to add some depth.


I then stamped 'hello' in the bottom right corner with the A5 Decay Alphabet lowercase stamp set.


To finish, I mounted the large background on to a white 7.5" square. 

Thanks for popping by my blog today, please leave a comment if you wish, I love to hear your thoughts.
Toodles for now,
Lisa xxx 


Here are the stamps I used... which are available on The Artistic Stamper website.

Tracy Scott Background 8 (cut out & mounted on cling cushioning)       Mini Backgrounds #1  size A6 (cut out and mounted on cling cushioning)      Decay Alphabet lower case size A5 (cut out and mounted on cling cushioning)

Tuesday, 22 May 2018

The Girl in the Frame with Itsy Bitsy

Hello lovely peeps and welcome to my second project for Itsy Bitsy.
I've called this project 'The Girl in the Frame'.


I used lots of Itsy Bitsy mixed media products for this project to build up some fabulous texture.

Here is the step by step process...


I started with a 12 inch square piece of greyboard as it is a good base to apply lots of different mediums to.
I tore a 12 inch square of Little Birdie textured card in to strips then glued them to the centre of the greyboard square.


I then cut pieces from the burlap roll in to strips pulling apart the fibres to create holes, then glued it around the edges of the greyboard using the matte gel medium. 


When everything had dried, I gave everything a coat of the white 2-in-1 Gesso and modelling paste.


Next, I added some colour using blue and lime Little Birdie colour splash. I then added some more of the 2-in-1 Gesso over the centrecentre, allowed it to dry, then added splashes of the Little Birdie Gold Soot Alcohol Splash.


I placed half a teaspoon of mixed media stones on to a acrylic block and added a couple of drops of Golden Soot Gold Alcohol Splash, mixed the stones and left to dry.


I coloured the Primed Chipboard Hearty Circle with Black Soot Alcohol Splash.


I found a couple of old photography film negatives and distressed them, then added some white mixed media 2 in 1 gesso and modelling paste.


I took a black and white photograph , distressed it then used the Two Step Crackle Medium over the top.


Making sure the base was dry, I added some splashes of the Golden Soot Gold Alcohol Splash then added all the other elements and added some Little Birdie Flowers – Jacey handmade florets and Sea Foam Dew Drops.


Here is the finished piece...


And some close-ups...


Thanks for popping by my blog today to have a toot at my Itsy Bitsy Design Team project.
Toodles for now,
Lisa xxx 


If you would like a toot at my project on the Itsy Bitsy blog, here is the link... 

Here are all the Itsy Bitsy products I used which are all available on the Itsy Bitsy website.